
The most durable option is cast, marine-grade vinyl with a marine adhesive, applied to a clean hull between 60°F and 80°F. Wash the surface with soap and water, then wipe it down with isopropyl alcohol to strip wax, grease, and oxidation before the vinyl ever touches metal. If you're ordering rather than cutting your own, confirm the vendor uses cast vinyl and includes transfer-paper installation instructions with the shipment.
TL;DR:
- Cast marine-grade vinyl with UV stabilization provides the best long-term durability, especially in sun and saltwater conditions, over calendared vinyl, which shrinks and cracks.
- Proper surface preparation, including cleaning with soap, water, and isopropyl alcohol, is responsible for approximately 80% of decal longevity, regardless of vinyl quality.
- For aluminum hulls, registration numbers should be proportional to hull size, high-contrast, and placed on the forward half to meet legal visibility requirements.
- Applying decals in mild, overcast weather between 60°F and 80°F with a clean, fully cured surface is critical for bubble-free, lasting adhesion.
- Using low heat and a plastic scraper is essential for remove or repairing vinyl around rivets and curved sections, preventing bubbles and lifting over time.
Table of Contents
- Which Materials Actually Hold Up on Aluminum Boats?
- How Do You Choose the Right Size and Design for an Aluminum Hull?
- How Do You Prep and Apply Decals on an Aluminum Boat?
- How Do You Handle Rivets and Curved Sections on Aluminum Hulls?
- How Do You Remove or Refresh Boat Decals Safely?
- Where Should Decals and Graphics Go on a Fishing Boat or Pontoon?
- What Makes RegistrationDecals.com a Reliable Source for Aluminum Boat Decals?
- What Does It Cost to Get Decals on an Aluminum Boat?
- A Contributor's Take on the Mistakes That Actually Cause Failures
- Ready to Order Custom Decals for Your Aluminum Boat?
- Sources
- FAQ
Which Materials Actually Hold Up on Aluminum Boats?
Not all vinyl is built the same, and the difference shows up fast on a hull that sits in sun and saltwater all season.
Vinyl comes in two basic forms: calendared and cast. Calendared vinyl is stretched and rolled during manufacturing, which leaves internal stress in the material. That stress releases over time as heat and UV exposure work on it, and the vinyl shrinks, curls at the edges, or cracks. Cast vinyl is poured and cured instead of stretched, so it holds its shape far longer under the same conditions. Manufacturer and installer guides consistently point to UV-stabilized cast vinyl as the standard for marine use because it resists shrinking in ways calendared material simply doesn't.
Adhesive matters just as much as the film itself. "Marine-grade" adhesive generally means a pressure-sensitive acrylic formulated to stay flexible in cold water and stay gripped through heat, salt spray, and repeated washdowns. Cheaper craft-vinyl adhesives soften in heat and lift at the edges within a season, especially on a hull that gets trailered and exposed to direct sun.
A few other specs to check before you buy or cut anything:
- Thickness: most marine-grade vinyl runs between 2 and 4 mils; thinner film tends to tear during transfer-paper removal on curved or riveted surfaces.
- Finish: matte vinyl hides rivet outlines and small surface imperfections better than gloss, which highlights every bump and seam.
- Lifespan factors: UV exposure, saltwater frequency, and whether the boat sits covered or uncovered between trips all shorten or extend how long a decal looks sharp.
- Coating compatibility: vinyl adheres fine to cured paint and most ceramic coatings, but freshly painted surfaces need a full cure window first.
Installers who work on boats daily report that roughly 80% of decal longevity comes down to preparation, not the actual install technique. A rushed clean job undoes even the best vinyl. If you want a deeper breakdown of vinyl grades and adhesive types before buying, the guide to durable boat vinyl covers the tradeoffs in more depth.
How Do You Choose the Right Size and Design for an Aluminum Hull?
Registration numbers aren't just decoration. Most states require them to be a minimum height (typically 3 inches) and placed on the forward half of the hull, visible from either side. Beyond that legal minimum, though, sizing and design choices come down to the hull you're working with.
Jon boats and narrow-sided fishing boats have less flat real estate than a pontoon deck or a wide-beam bass boat, so oversized graphics wrap awkwardly around chines and rivet lines. A few practical rules help:
- Keep registration numbers proportional to hull length. A 14 foot aluminum boat rarely needs numbers much larger than the state minimum.
- Choose high-contrast colors. Dark numbers on a light aluminum hull, or reflective white on a darker paint job, read better at a distance than low-contrast combinations.
- Design decorative graphics to run parallel to the rub rail rather than cutting across seams, which reduces wrinkling on curved sections.
- Scale camo patterns and fish graphics down for narrow hull sides. What looks proportional on a wide bass boat transom often overwhelms a jon boat's side panel.
- For long-term durability, pre-cut letters and numbers generally outlast large printed panels, since there's less surface area for edges to catch and lift.
If you're unsure how numbers should be sized or spaced for your specific hull, the aluminum boat registration number guide walks through placement by hull type.
How Do You Prep and Apply Decals on an Aluminum Boat?
Getting a clean, bubble-free install isn't about having special tools. It's about sequence. Skip a step here and you'll see it in the decal within weeks, not years.
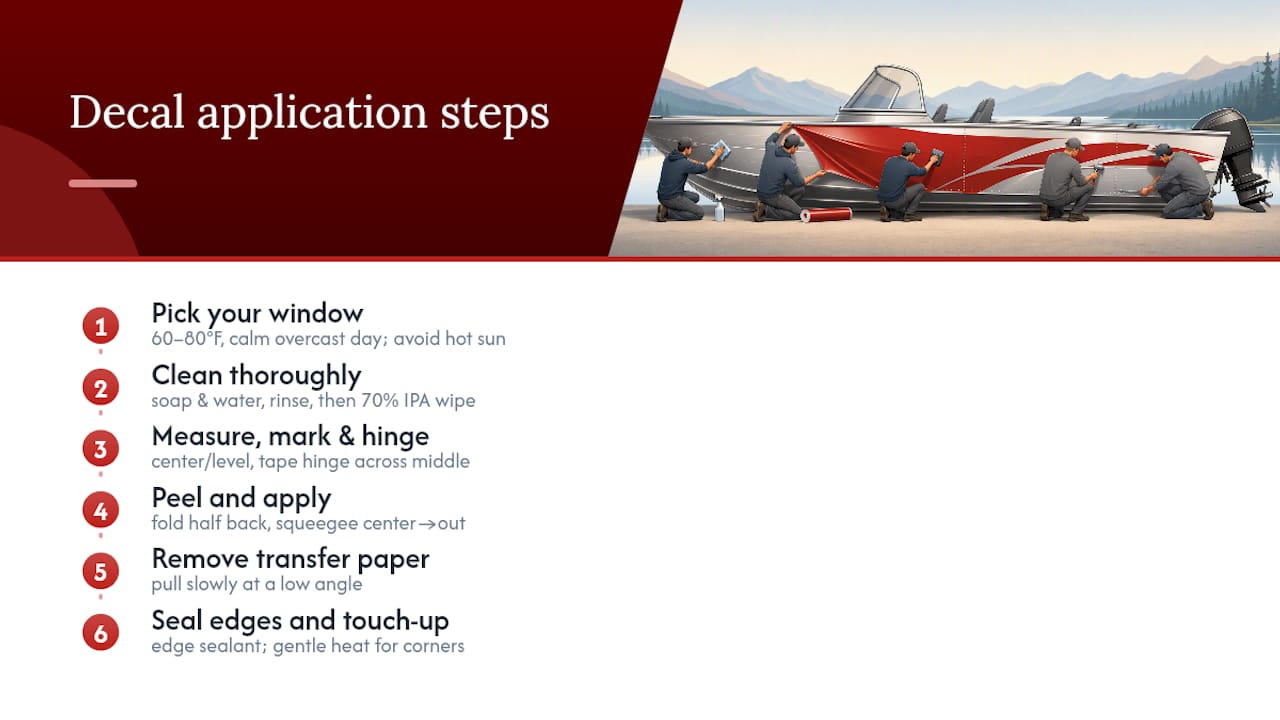
Step 1: Pick your window. Apply on a calm, overcast day if possible, with hull and air temperature between 60°F and 80°F. Avoid direct sun on a dark hull, since surface heat can spike well above ambient air temperature and compromise the adhesive before it ever sets.
Step 2: Clean thoroughly. Wash the application area with mild soap and water, rinse completely, and let it dry. Then wipe the surface with a cloth dampened in 70% isopropyl alcohol to remove any leftover wax, grease film, or light oxidation. Skipping the alcohol wipe is the single most common reason decals fail early, even when the vinyl itself is high quality.
Step 3: Measure and mark. Measure your placement area and lightly mark center points with a pencil or piece of tape. If the decal has multiple lines or a logo, check it's level before you commit to anything.
Step 4: Create a hinge. Lay the decal in position with its transfer paper and backing still attached, then run a strip of masking tape across the middle to create a hinge. This lets you fold one half back without losing your alignment, which is the technique most installers rely on for precise placement.
Step 5: Peel and apply. Fold back one side, peel away the backing paper on that half, and press the vinyl down starting from the hinge and working outward. Use a felt-edge squeegee, always moving from the center out, to push out air as you go. Repeat on the other half.
Step 6: Remove the transfer paper. Once the vinyl is fully pressed down, pull the transfer paper away slowly at a low angle, close to the surface, rather than lifting it straight up. This keeps small letters and thin lines from lifting with the paper.
Step 7: Seal the edges. A product like Seal-It or a similar edge sealant on the decal's perimeter helps prevent wind lift, especially on boats that see a lot of wake and washdown.
Pro Tip: Keep a heat gun on its lowest setting nearby, not for the main install, but for touch-ups. A few seconds of gentle heat over a stubborn corner makes the vinyl more pliable without stretching or bubbling it.
For a full supply checklist, from squeegee type to recommended sealants, the step-by-step installation guide covers tools most installers keep on hand.
How Do You Handle Rivets and Curved Sections on Aluminum Hulls?
Rivets are where most DIY installs go wrong. Vinyl that lies flat everywhere else will trap air right at the rivet head unless you work it deliberately.
The fix is low, controlled heat. Warm the vinyl gently with a heat gun set low, just enough to soften it, then press firmly around each rivet with a felt squeegee, working the film down into the recess rather than stretching it flat over the top. Practitioner forum notes from installers who work on aluminum hulls regularly describe this rivet-by-rivet approach as the difference between a decal that seals for years and one that bubbles within a month.
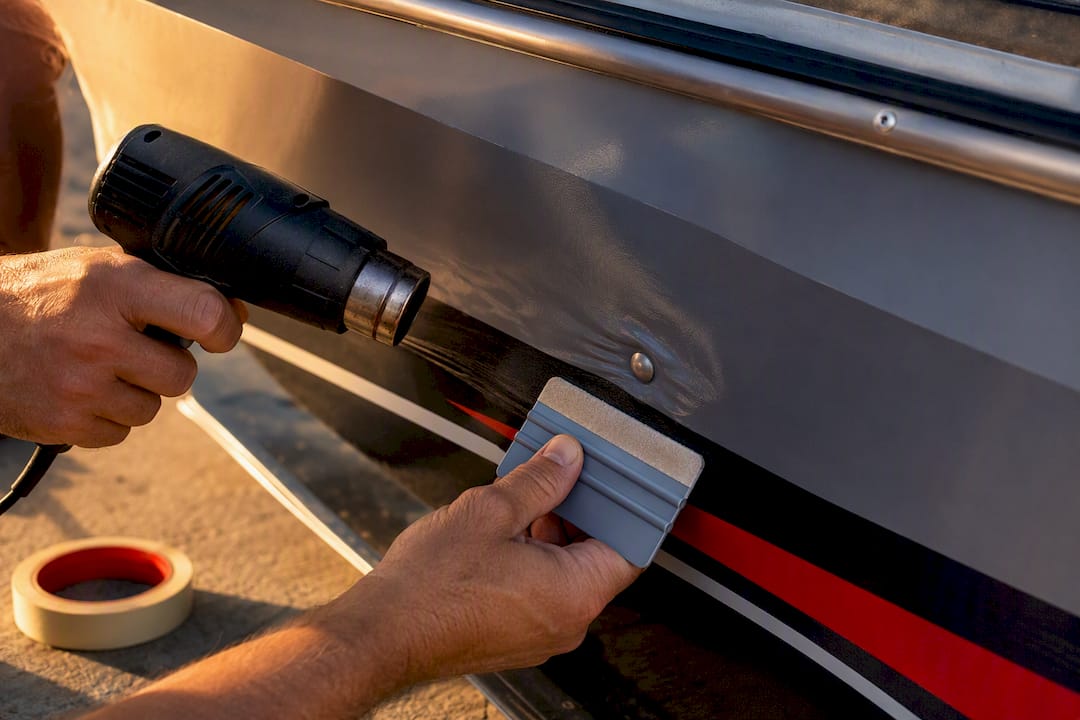
If a small air pocket still forms, don't panic and don't rip the decal off. Use a pin to make a tiny pinhole, press the trapped air out toward the hole, then reheat lightly and press again to reseal. It's a five-minute fix, not a redo.
On hulls with heavy corrugation or dense rivet patterns, consider segmenting large graphics into smaller panels instead of running one continuous piece across the whole area. Rivet-rich sections often look cleaner with matte finishes too, since matte vinyl disguises the rivet outline better than gloss.
How Do You Remove or Refresh Boat Decals Safely?
Removal is where a lot of boat owners damage paint they didn't need to touch. The safe method uses heat, not force.
Warm the decal with a heat gun on a low or medium setting, moving steadily so you don't scorch one spot, then work a plastic scraper (never metal) under an edge and peel slowly while the adhesive is still warm. This heat-and-scrape method is the standard approach for pulling vinyl off aluminum without gouging the surface underneath.
For leftover adhesive residue, a citrus-based adhesive remover or isopropyl alcohol usually clears it without harming paint or clear coat. Avoid caustic paint strippers or anything marketed for heavy-duty industrial stripping. Those products can eat through marine paint and clear coat just as easily as they lift adhesive.
Once new decals are applied, a little routine care extends their life considerably:
- Rinse salt off the hull after every trip, especially around decal edges where salt crystals can work under the film.
- Skip automatic brush washes at the marina; the bristles catch edges and can peel corners over repeated passes.
- Give a fresh install a full 24 to 48 hours to cure before the boat goes back in the water.
- Check edges periodically and reseal with a sealant pen if you notice any lifting starting.
Where Should Decals and Graphics Go on a Fishing Boat or Pontoon?
Placement is part legal requirement, part common sense. Registration numbers go on the forward half of the hull, on both sides, positioned to read left to right when viewed from outside the boat. Boat names and hailing ports typically sit on the transom or upper hull sides where they're visible from the dock.
A few placement guidelines keep things looking intentional rather than cluttered:
- Scale decorative panels to leave clear space above the rub rail; graphics that run into hardware or trim look unfinished.
- Balance logo placement with registration numbers so neither competes for the same sightline.
- Reserve the transom for boat names, sponsor panels, or tournament decals, since it's the most visible flat surface on most aluminum boats.
- For one-off events, temporary decorations rated for outdoor UV exposure hold up better than standard adhesive decor, and should come off right after the event rather than riding out the season.
What Makes RegistrationDecals.com a Reliable Source for Aluminum Boat Decals?
Custom decal providers produce decals from marine-grade vinyl engineered to be UV-safe and saltwater-proof, matching the cast-vinyl standard covered above. Online design tools let you enter your registration number, then pick colors and fonts and preview the layout before ordering, which takes the guesswork out of sizing for narrow aluminum hull sides. Orders often ship within a few business days, with shipping policies varying by provider.
What Does It Cost to Get Decals on an Aluminum Boat?
Material and installation costs vary more than most boat owners expect, mostly based on whether you're buying pre-cut registration numbers or a full custom graphic package.
Basic registration number sets, cut from cast vinyl in standard fonts and colors, sit at the lower end of the cost range since they require no custom artwork. Custom logos, sponsor panels, or full-hull wraps cost more because they involve design work, larger vinyl sheets, and sometimes multi-panel printing to fit around rivets and seams cleanly.
Professional installation adds a separate line item, and it's worth considering for large graphics or full wraps. Boatus's own installation guidance recommends getting an extra set of hands, or a professional installer, for bigger pieces where alignment mistakes are costly to fix. A crooked registration number is an easy DIY save. A wrinkled 4 foot sponsor panel is not.
For most aluminum boat owners doing a straightforward registration number replacement, DIY installation with quality cast vinyl and basic tools (squeegee, alcohol wipes, masking tape) is realistic and keeps costs down. Save professional installation for large decorative wraps, tournament graphics, or situations where the hull's rivet pattern makes DIY alignment genuinely difficult.
A Contributor's Take on the Mistakes That Actually Cause Failures
Taylor's take: the DIY failures that show up most aren't material problems, they're sequence problems. Skipping the alcohol wipe, misaligning the hinge, or applying vinyl to a hull baking in direct sun causes more early peeling than any vinyl grade difference ever does.
Before you apply or order, run this: confirm you're buying cast marine-grade vinyl, confirm the surface is clean and cured, and confirm your size and placement match your hull and your state's requirements.
— Taylor
Ready to Order Custom Decals for Your Aluminum Boat?
Registrationdecals is the practical alternative to guessing your way through a generic sticker printer or cutting vinyl yourself with no marine-grade guarantee. The online design tool at Registrationdecals lets you enter your registration number, choose your font and color combination, and preview exactly how it will sit on your hull before you pay for anything. That preview step alone saves most owners from the sizing mistakes covered earlier in this guide.
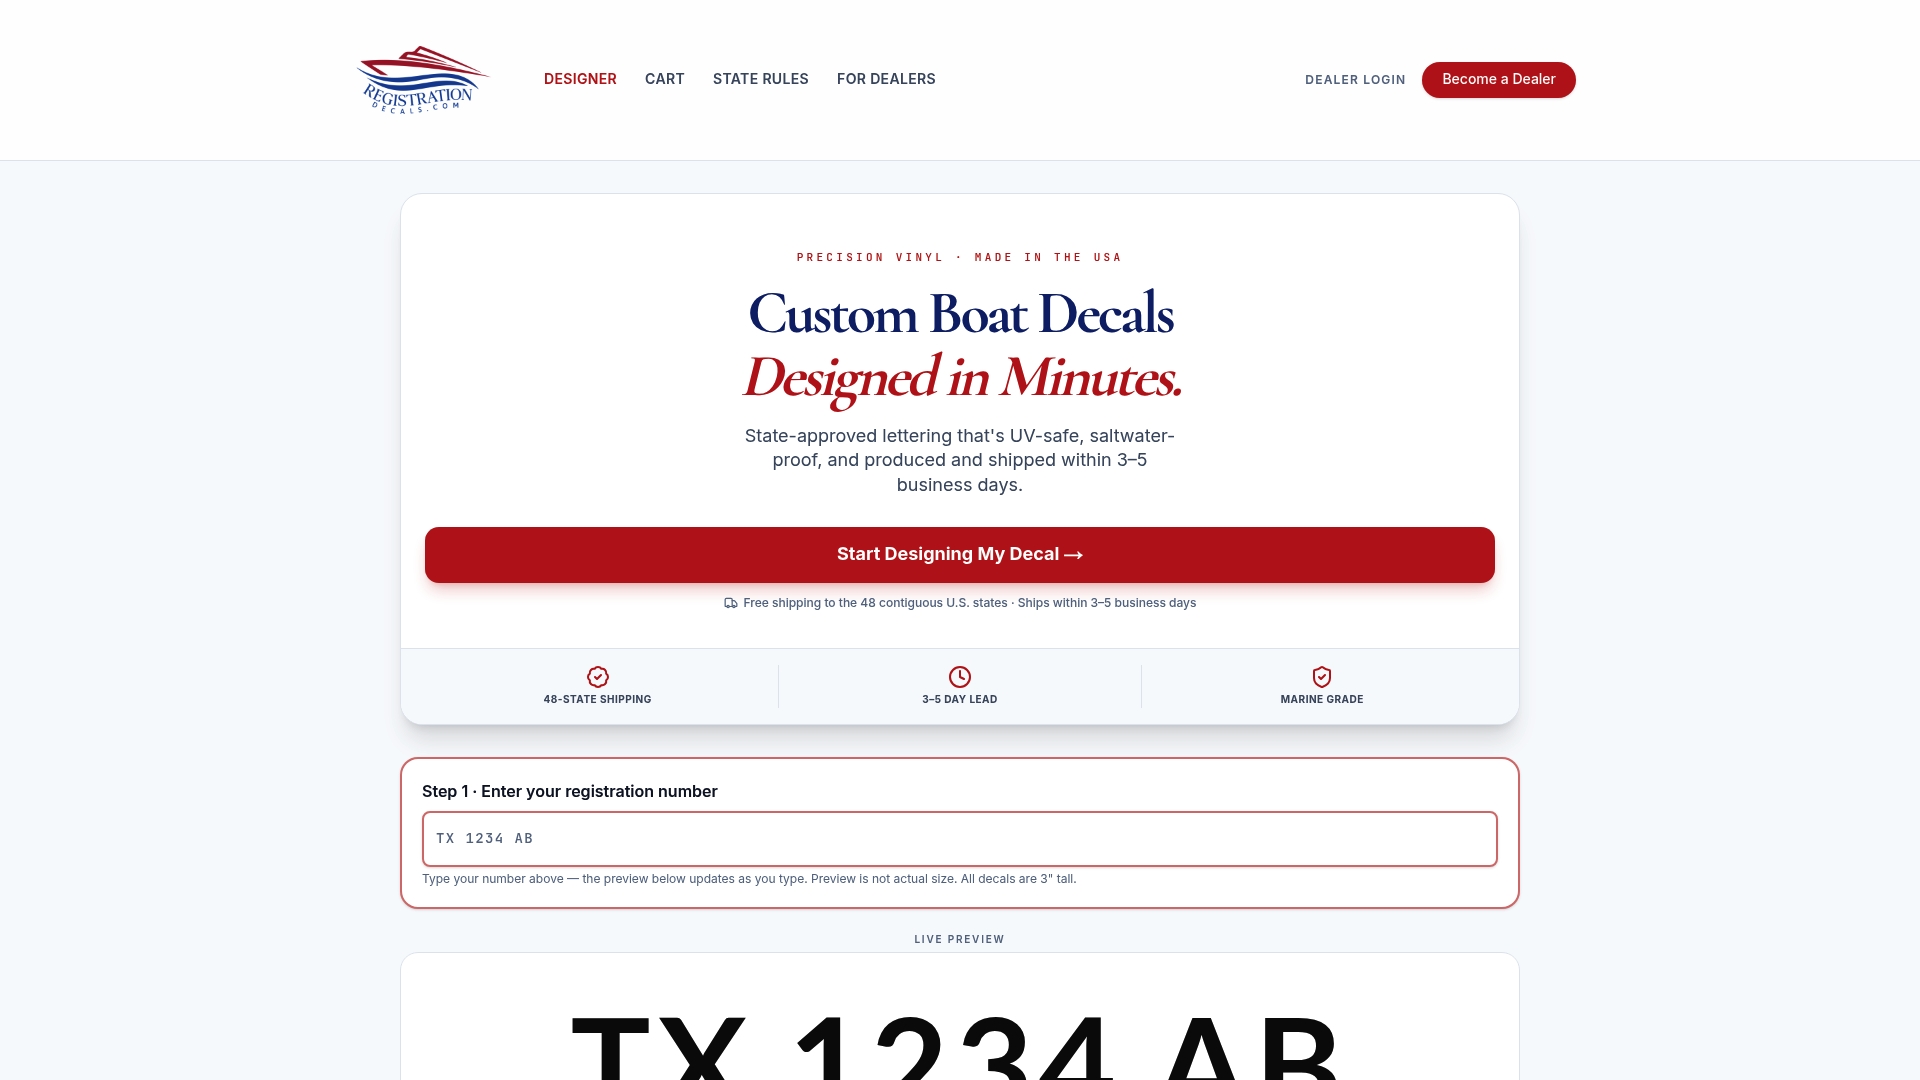
Every order uses the same cast, marine-grade vinyl this guide recommends throughout, UV-safe and saltwater-proof, built to handle the same rivets, sun, and salt spray your hull deals with every season. Production takes 3 to 5 business days, with free shipping across the contiguous United States, so you're not waiting weeks for a compliance fix you need now. If you're specifically outfitting an aluminum hull, start with the aluminum boat registration number decals page, where sizing options are already built around narrow hull sides and rivet-heavy surfaces. Marinas and dealerships placing multiple orders can check the wholesale program for dealers for bulk pricing.
Sources
- Applying Boat Decals | Boating Mag
- How to remove stickers from your boat, vinyl lettering and decals | StickerYou Blog
- Tinboats
- BoatUS installation instructions (Boatus)
FAQ
Can You Put Stickers on Aluminum Boats?
Yes. Cast, marine-grade vinyl decals adhere well to clean, properly prepped aluminum, and they hold up far better over time than standard craft or paper stickers.
How Do You Get Decals off an Aluminum Boat?
Warm the decal with a heat gun on low to medium heat, then peel it slowly with a plastic scraper while the adhesive is still soft, which avoids scratching the metal or paint underneath.
Where Should Decals Go on a Boat?
Registration numbers belong on the forward half of the hull on both sides, readable left to right, while boat names, logos, and decorative graphics typically go on the transom or upper hull sides for visibility.
What Paint Sticks to an Aluminum Boat?
Most marine-grade paints and primers formulated for aluminum will bond well, but vinyl decals need a fully cured paint surface before application; installing over fresh paint too early is a common cause of adhesion failure.
Is Cast Vinyl Worth the Extra Cost Over Calendared Vinyl?
For a boat that sits in sun and saltwater regularly, yes. Cast vinyl resists shrinking and cracking far longer than calendared vinyl, which makes it the standard choice for marine-grade decals.