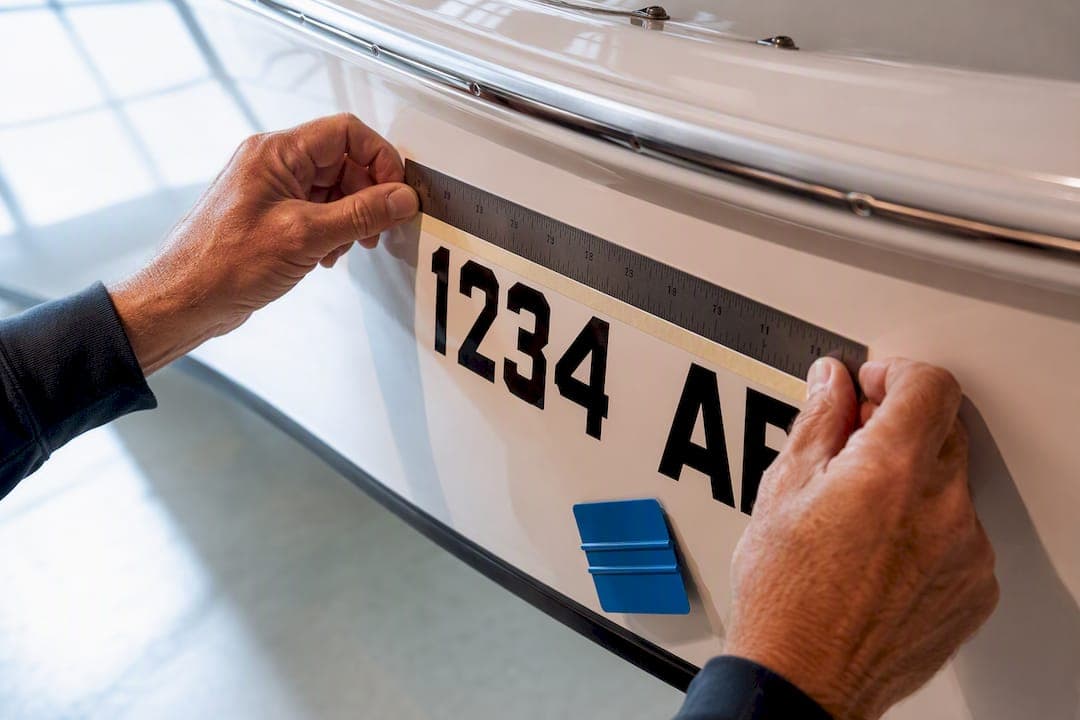
Place plain block characters that meet the federal minimum size requirement on both sides of the forward half of the hull, spaced evenly and read left to right. Use a straight guideline (masking tape works fine) or a pre-spaced decal kit to keep both sides matched. If your hull curves too much for a flat run of numbers, mount them on a rigid backing plate instead. Before you commit to adhesive, check your state's exact placement rules and keep validation stickers within 6 inches of the registration number.
TL;DR:
- Proper boat registration numbers must be at least 3 inches tall, in plain block letters, and displayed on both sides of the forward hull.
- Numbers should be aligned using a straight, level baseline measured from a consistent reference point like the gunwale or waterline.
- A gap between character groups must match the width of one letter to avoid inspection issues, with validation decals placed within 6 inches of the numbers.
- For curved hulls, a rigid backing plate helps keep vinyl flat and fully visible on both port and starboard sides.
- Using pre-spaced decals and thorough surface cleaning with isopropyl alcohol improves accuracy and reduces installation errors.
Table of Contents
- What Are the Federal and State Rules for Boat Number Placement?
- What Tools Do You Need Before Aligning Boat Numbers?
- How Do You Measure and Space Boat Registration Numbers Correctly?
- Wet or Dry Application: Which Method Gets You Straighter Numbers?
- What Mistakes Cause Boat Numbers to Fail Inspection?
- How Registrationdecals Supports Accurate, Compliant Alignment
- Order Pre-Spaced Decals Built for a Clean, Compliant Install
- Where to Verify Your State's Exact Placement Rules
- Sources
- FAQ
What Are the Federal and State Rules for Boat Number Placement?
The federal baseline comes from 33 CFR 173.27, and it's shorter than most boat owners expect. Numbers must be plain, vertical block characters, at least 3 inches tall, displayed on each side of the forward half of the hull, and read left to right. No italics, no script, no cursive flourishes. Block letters only.
Most states follow a standard format: a two-letter state prefix, up to four numerals, and a two-letter suffix, with a space or hyphen between groups equal to the width of one letter. That spacing rule is where a lot of installers guess wrong, since a gap too narrow or too wide can trip up a state boating inspection.
Validation decals have their own placement rule: they need to sit within 6 inches of the registration number, though the exact side (left or right of the number) varies by state.
- Minimum character height: at least the federally required minimum size, in plain block font
- Placement: forward half of the hull, both sides
- Reading direction: left to right, always
- Validation sticker: within 6 inches of the number
- Documented vessels: follow different marking rules and typically skip state numbers on the bow altogether
Quick fact: A gap between letter groups that doesn't match the width of one character is one of the most common reasons inspectors flag otherwise well-installed numbers.
What Tools Do You Need Before Aligning Boat Numbers?
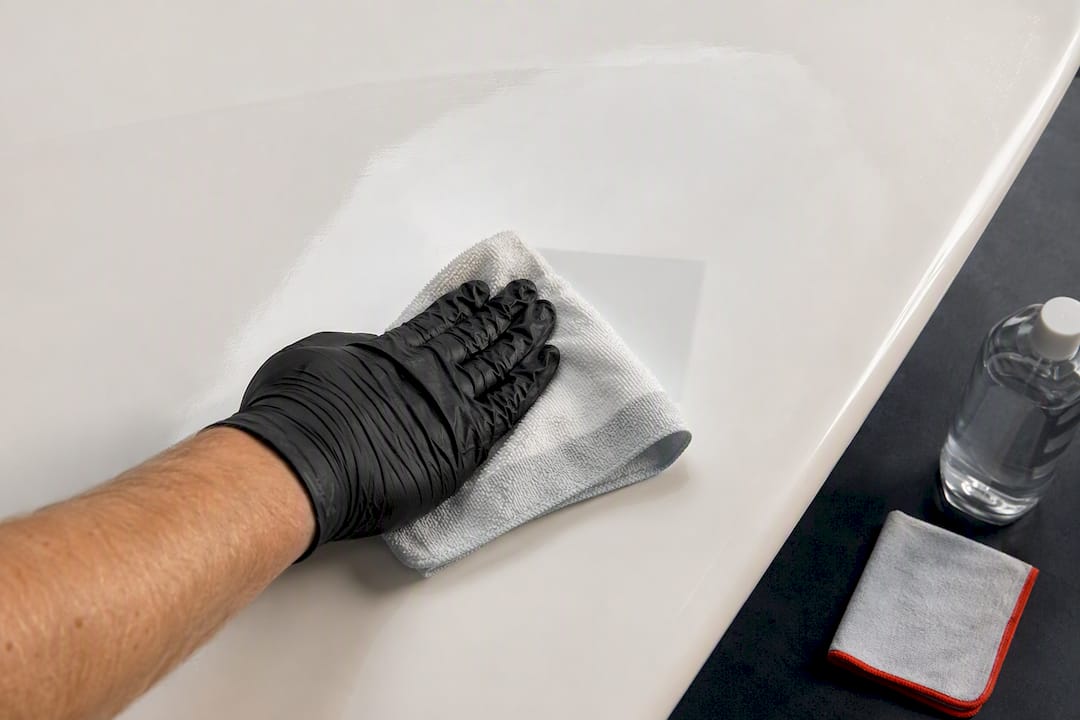
Good alignment starts before the vinyl ever touches the hull. Gather a measuring tape, a level, masking tape, a marine-grade cleaner or isopropyl alcohol, lint-free cloths, a squeegee or old plastic gift card, and a pencil or water-soluble marker for your guide marks.
Surface prep is where most decals actually fail. Grease, wax residue, or leftover moisture under the vinyl causes lifting within weeks, not years. An alcohol-based degreasing wipe, followed by a dry lint-free cloth, gets the surface clean enough for a lasting bond, according to installation guidance from Boating World.
- Measuring tape and level for consistent height
- Masking tape for a straight, removable guideline
- Isopropyl alcohol and lint-free cloths for degreasing
- Squeegee or plastic card for smoothing air out
- Pencil or water-soluble marker for placement marks
If you'd rather skip the individual-letter math entirely, pre-spaced number kits and alignment templates solve the spacing problem before you even pick up the squeegee. For inflatables or hulls with heavy curvature, a rigid backing plate gives the vinyl a flat surface to grip.
Pro Tip: Wipe the hull twice with alcohol, not once. The first pass lifts grime; the second removes the residue that first pass leaves behind.
How Do You Measure and Space Boat Registration Numbers Correctly?
Getting both sides to match starts with a consistent reference point, not a guess. Here's the sequence that keeps numbers level and legible from either angle:
- Pick one reference line. Measure from the gunwale or the waterline, whichever is more consistent along your hull's curve, and use that same line on both sides.
- Mark with masking tape. Run a strip of tape as your baseline, then measure up 3 inches (or your chosen height) and mark the top edge too.
- Set your spacing. Leave a gap equal to one letter's width between the state prefix, the numeral group, and the suffix. Pre-spaced strips handle this automatically; individual characters need a spacer card or template.
- Check for symmetry. Step back and compare both sides before removing any tape. A half-inch difference in height is obvious from ten feet away.
- Handle curved hulls separately. If the bow curves too sharply for numbers to stay flat and readable, attach a rigid backing plate to the forward half instead of applying vinyl directly to the curve, a method Oregon's state marine board recommends for inflatables and heavily contoured hulls.
Backing plates solve a problem that flat vinyl can't: keeping both port and starboard numbers fully visible when the hull itself blocks a straight sightline. Bolt or rivet the plate securely, since a loose plate defeats the purpose. Confirming spacing before you commit to adhesive also saves you from redoing an entire side over a quarter-inch miscalculation.
Wet or Dry Application: Which Method Gets You Straighter Numbers?
Your choice between wet and dry application depends mostly on decal size and your own steady hand.
Dry method (best for smaller runs or confident installers):
- Position the decal using your masking-tape guide, then step back and check alignment before peeling anything.
- Peel back a small section of the backing paper, press that section down, and work outward.
- Squeegee from the center toward the edges to push out air as you go.
- Slowly pull away the transfer tape at a low angle, checking that every letter stayed put.
Wet method (best for long pre-spaced strips or full number sets):
- Mix a few drops of dish soap into a spray bottle of water and mist the hull surface lightly.
- Lay the decal onto the wet surface. The soapy water lets you slide it into position without it sticking prematurely.
- Once aligned, squeegee firmly from the center outward to push out both water and air.
- Let it set for a few minutes, then remove the transfer tape and blot any remaining moisture from underneath the edges.
Small bubbles usually work themselves out if you squeegee again within the first hour. A lifted corner means the surface wasn't fully clean. Peel that section back, re-degrease, and reapply rather than pressing over it. Both methods rely on the same core discipline: work from the center out, never from one edge across.
Pro Tip: Apply numbers on a mild day out of direct sun. Vinyl gets tacky and unmanageable fast once hull temperatures climb past 85°F.
What Mistakes Cause Boat Numbers to Fail Inspection?
The most common citations trace back to a short list of avoidable errors: characters under 3 inches, script or slanted fonts instead of plain block letters, poor color contrast against the hull, incorrect spacing between letter groups, and validation stickers placed more than 6 inches from the number or overlapping an old, expired decal.
Run this check before you launch: measure at least one character on each side to confirm it's at least 3 inches tall, step back 15 to 20 feet and read the numbers from that distance, and confirm the validation sticker sits within the 6-inch window.
- Rinse the hull with fresh water after saltwater use to prevent salt buildup at the decal edges
- Skip harsh solvents or pressure washing directly on the numbers
- Replace decals once edges start lifting or the color fades unevenly, rather than waiting for a full failure
How Registrationdecals Supports Accurate, Compliant Alignment
Getting the spacing and height right by hand is doable, but it's also exactly where most do-it-yourself installs go sideways. Registrationdecals built its online design tool around removing that guesswork: enter your state, your registration numbers, and your preferred font and color, and the tool outputs pre-spaced decals sized to meet the 3-inch federal minimum automatically.
A few things worth knowing before you order:
- Decals are cut from marine-grade vinyl rated for UV exposure and saltwater, which matters more than most owners realize once a decal spends a full season in direct sun
- Production runs 3 to 5 business days, with free shipping across the contiguous United States
- The step-by-step installation guide walks through the same wet and dry techniques covered above, matched to the exact decal set you ordered
Pre-spaced kits don't eliminate the need to measure your hull and mark a straight guideline. What they remove is the letter-by-letter spacing math that trips up most first-time installers.
A Quick Note From Taylor: Test Before You Commit
Before any adhesive touches the hull, lay out a full mock version with masking tape and photograph both sides. Compare the photos side by side, not just eyeballed in person. Keep your registration paperwork onboard, and when a state rule looks ambiguous, call your local marine agency before you cut vinyl. It's cheaper than redoing a side.
— Taylor
Order Pre-Spaced Decals Built for a Clean, Compliant Install
Skip the letter-by-letter spacing math entirely: Registrationdecals' design tool generates numbers already sized and spaced to federal specifications, so alignment becomes a measuring-and-mounting job instead of a guessing game.
Every set ships in vinyl rated for UV and saltwater exposure, cut to order in a few business days with free shipping across the contiguous United States. Whether you're outfitting a bass boat, a pontoon, or a jet ski, the custom registration numbers page lets you enter your exact state format and preview the layout before you order. Running a fleet? The same tool handles bulk orders for marinas and dealerships. If your hull calls for something specific, check the pontoon number options or jet ski numbers built for those exact hull shapes. Pair your order with the installation guide and you'll have both sides aligned and set before your next trip to the ramp.
Where to Verify Your State's Exact Placement Rules
Check 33 CFR 173.27 for the federal baseline, your state marine agency's page (such as Oregon's numbering guide) for local variations, and Registrationdecals' placement answers page for quick reference.
Sources
- Displaying the Registration Number and Validation Decals — Boat-Ed (Oklahoma study guide)
- OR number placement, spacing and finding the HIN — Oregon State Marine Board
- Tips and tricks for applying boat registration numbers — Boating World
FAQ
How Do I Look Up My Boat's Registration Number?
Your registration number appears on the physical certificate issued by your state marine agency; if you've lost it, most states let you search by hull identification number (HIN) or owner name through their boating agency's online portal.
Do Boat Numbers Need to Be on Both Sides?
Yes. Federal rule 33 CFR 173.27 requires registration numbers on both sides of the forward half of the hull, read left to right, and this applies to boats, pontoons, and jet skis alike.
How Do I Display Boat Registration Numbers in Tennessee?
Tennessee follows the same federal baseline as most states: plain block characters at least 3 inches tall on both sides of the forward hull, with the validation decal placed within 6 inches of the number, though you should confirm any local specifics with the Tennessee Wildlife Resources Agency before applying decals.
Where Can I Order Boat Numbers?
Registrationdecals.com produces custom, pre-spaced registration decals cut from marine-grade vinyl, built to match your state's exact spacing format, with production in 3 to 5 business days and free shipping across the contiguous United States.
What's the Minimum Height for Boat Registration Numbers?
Federal regulation sets the minimum at 3 inches for plain vertical block characters, and most states enforce that same minimum without exception.