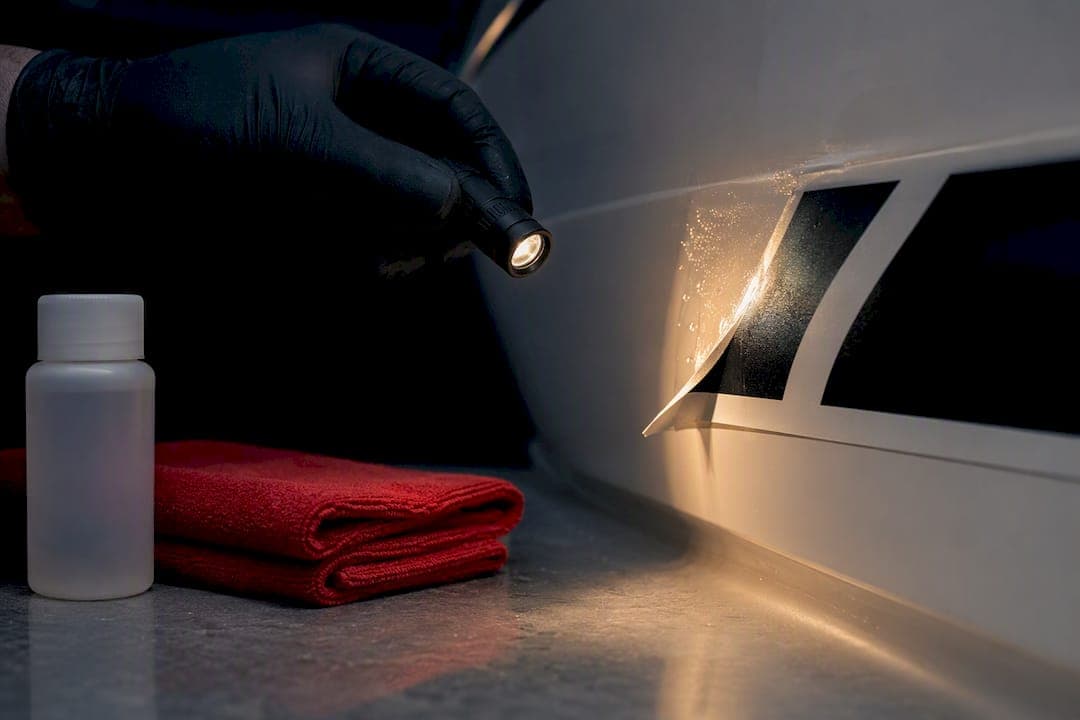
Skip the wax. Waxing a hull or panel before applying vinyl decals leaves behind a film that blocks the adhesive from bonding to paint, and that's the single most common cause of curling edges and early failures. Wash the surface with a wax-free detergent, then do a final wipe with isopropyl alcohol (IPA) right before you apply anything.
TL;DR:
- Applying decals on surfaces with any residual wax, silicone, or ceramic coatings will prevent proper adhesion and cause edges to lift over time.
- Always wash with a wax-free detergent, followed by a thorough IPA wipe, and apply decals within minutes of the final cleaning step to ensure optimal bonding.
- Avoid waxing after decal installation, and if necessary, use only non-solvent, carefully applied wax around edges to prevent buildup that lifts the film.
- Solvent-based waxes, silicone tire shines, and abrasive polishes near decals can soften or damage vinyl, risking adhesion failure or surface damage.
- Cold weather can affect adhesive performance, so additional preparation considerations are necessary when working in low temperatures.
Table of Contents
- Why Waxing Before Decals Wrecks Adhesion
- How to Prep a Surface Before Applying Decals
- Waxing Before vs. After: What's Actually Safe
- Products and Habits That Sabotage Decal Adhesion
- Final Prep Checklist and Timing Before You Apply
- Installer Perspective: Practical Tips From Taylor
- RegistrationDecals.com: Built for the Prep Work You Just Did
- Sources
- FAQ
Why Waxing Before Decals Wrecks Adhesion
Vinyl adhesive needs a surface that's chemically clean, not just visually spotless. Wax, silicone-based polishes, and even some ceramic coatings leave a microscopic layer on the paint that the adhesive can't grip through. You can wash a hull until it shines and still have a wax film sitting there invisible to the eye but very much in the way.

That's why Avery Dennison's own substrate prep bulletin insists on removing all wax, grease, polish, and coating residue before laying down film. The edges of a decal are where this failure shows up first: wax at the perimeter keeps the adhesive from sealing down, and that thin gap becomes an entry point for water and grit. Give it a season on the water and the edge lifts, then peels back further with every wash.
3M's own guidance for vehicle graphics goes further, warning against waxing or using solvent-based products on installed graphics at all, because those products can also degrade the vinyl itself over time. Manufacturers who make the vinyl and the adhesive agree on this one: wax and decals don't mix, whether it's applied before or after installation.
How to Prep a Surface Before Applying Decals
Surface prep isn't complicated, but skipping a step is exactly how decals end up floating off six months later. Follow this order every time:
- Wash with a wax-free detergent. Skip anything labeled "wash and wax" or "with conditioners." A basic dish soap or dedicated pre-wax cleaner works better here than a fancy car soap.
- Strip stubborn residue with a solvent. Tar, sap, and old wax buildup often survive a regular wash. Use a wax and grease remover made for the job, and test it in a hidden spot first since some solvents can affect certain paints or gelcoats.
- Rinse and dry completely. Any leftover soap film is just another barrier the adhesive has to fight through.
- Do a final wipe with isopropyl alcohol. Use at least 70% IPA on a clean microfiber towel, as 3M's vehicle prep guide recommends, and work panel by panel rather than wiping the whole hull at once.
- Apply within minutes of that final wipe. Dust and airborne residue resettle fast, sometimes in under an hour.
- Run the nail test. Press a fingernail lightly against the surface. If it drags or feels tacky, there's still contaminant on it and you're not ready to apply.
Pro Tip: Keep two microfiber towels in rotation during the IPA wipe, one damp with alcohol and one bone dry to follow right behind it. That second pass keeps solvent residue from sitting on the surface and interfering with the adhesive.
Following instructions like how to apply vinyl boat registration decals alongside this prep sequence gives you the best shot at a clean, long-lasting install on the first try.
Waxing Before vs. After: What's Actually Safe
Waxing before installation is not recommended, but waxing after the decal is on is a little more nuanced. Manufacturers still don't recommend regular waxing directly over graphics, since even non-solvent waxes can build up at the seams over repeated applications and eventually contribute to the same edge-lifting problem. That said, field reports suggest a light, non-solvent wax applied carefully around (not directly over) a decal, with attention to keeping product out of the seams, tends to cause fewer problems than a full-strength solvent wax slathered across the whole panel.
If your goal is protecting the surrounding paint without risking the decal, you have better options than wax:
- Use a manufacturer-approved cleaner or polish rated safe for use near vinyl graphics.
- Consider a clear coat applied carefully over decals rather than wax, which can offer more even, lasting protection.
- Ask about a protective overlaminate on the decal itself if UV or abrasion resistance is the real concern.
- Keep waxing sessions focused on unwrapped paint, working around decal edges rather than through them.
Products and Habits That Sabotage Decal Adhesion
A handful of common garage habits quietly undermine even good surface prep. Solvent-based waxes are the biggest offender, since the solvents can soften vinyl and the wax leaves the same barrier problem as any other wax. Silicone-heavy tire shine products are a sneaky second culprit. Overspray drifts further than you'd think and leaves a slick residue on nearby panels.
- Skip abrasive polishes and machine buffing on or near vinyl. Heat from a buffer and abrasive compounds can both damage installed film.
- Avoid solvent-based waxes and silicone tire dressings anywhere near the application area.
- If the hull has a ceramic coating, check the coating manufacturer's removal guidance before applying decals, since some ceramic coatings bond aggressively and need specific products or professional stripping to fully clear.
Final Prep Checklist and Timing Before You Apply
Once the surface is clean, timing matters almost as much as the cleaning itself.
- Clean panel, then follow with the IPA final wipe.
- Dry the surface completely, checking for streaks or leftover film.
- Apply the decal within minutes, not hours, of that final wipe.
- If the paint is new, follow the paint manufacturer's cure time recommendation before doing any solvent wipe or decal work, since fresh paint can react differently to alcohol and adhesives.
- Run a quick verification: nail test for tack, a visual dust check, and a squeegee pass to confirm the decal is seated with no air pockets at the edges.
Cold weather changes the math too. If you're working in a garage below room temperature, adhesive behaves differently, so it's worth reading up on applying decals in cold conditions before you start.
Installer Perspective: Practical Tips From Taylor

The two mistakes I see most often aren't exotic. People skip the IPA wipe because the panel "looks clean," or they clean the whole boat at once and then take twenty minutes to get around to applying the decal, by which point dust has already resettled. Work panel by panel, and use a shot of compressed air in seams and rub rails where grit likes to hide.
For textured hulls, heavily curved consoles, or anything with a tricky factory paint job, don't guess. Get a second set of hands or look into heat and press techniques for textured surfaces before you commit a $35.99 decal set to a surface that's fighting you.
— Taylor
RegistrationDecals.com: Built for the Prep Work You Just Did
All that surface prep deserves a decal that actually holds up to it. The company offers marine-grade vinyl decals designed to be UV-resistant and saltwater-proof, produced to meet state registration requirements, with a production timeline of several business days and shipping within the contiguous United States.
Whether you're outfitting a pontoon, a bass boat, a jet ski, or an aluminum hull, the online design tool lets you set your registration numbers, pick colors and fonts, and place an order in a few minutes. Pair your custom decal set from Registrationdecals with the surface prep in this guide, and you've got a set that's ready to survive sun, salt, and repeated washdowns without lifting at the edges. Head over and design yours today.
Sources
For deeper technical detail, consult Avery Dennison's substrate cleaning bulletin, 3M's instruction bulletin on substrate selection and prep, and general project ideas at Print Cafe USA's decal guide.
- Caring for Your Vehicle Graphics (Eagle Graphics / 3M references)
- IB 1.01 - Substrate cleaning and preparation (Avery Dennison)
- 3M Protection Wrap Films: Vehicle prep for success guide (via EPD Window Film)
FAQ
What Should You Clean With Before Applying Decals?
Wash with a wax-free detergent first, then do a final wipe with at least 70% isopropyl alcohol on a clean microfiber towel right before applying the decal. Skip any wash product labeled "wax" or "conditioning."
Can You Wax Over Vinyl Decals?
Regular waxing directly over installed decals isn't recommended by manufacturers, since wax can build up at the seams over time and contribute to edge lifting. A light, non-solvent wax applied carefully around the decal edges, avoiding the seams, is generally safer than a full solvent-based wax across the whole panel.
When Should You Not Wax a Boat or Car?
Never wax immediately before applying decals, since the wax layer blocks the adhesive from bonding to the paint. Also hold off on waxing over freshly painted surfaces until the paint has fully cured, and avoid waxing directly over any installed vinyl graphics.
What Is the 48-Hour Rule for Waxing?
The idea behind a waiting period after cleaning or waxing is that residues and any leftover product need time to fully evaporate or settle before a decal can bond properly. In practice, installers rely less on a fixed hour count and more on the final IPA wipe done immediately before application, since even a clean-looking surface can pick up dust within minutes.