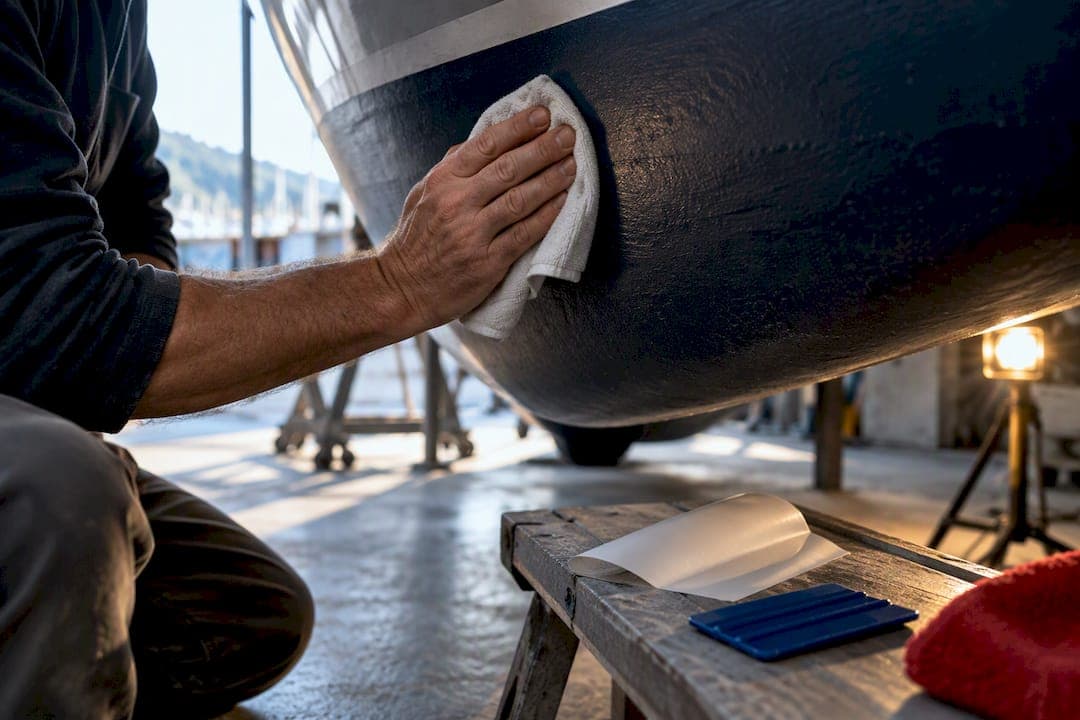
Yes, but only in specific conditions. Decals generally belong above the waterline, and only once antifouling paint has fully cured and been properly prepped. Textured, soft, or freshly applied antifouling coatings make poor surfaces for adhesive vinyl and often lead to lifting within a season. The sections below walk through prep, application, curing, and safe removal so you get it right the first time.
TL;DR:
- Decals should only be applied above the waterline, after the antifouling paint has fully cured, and within the recommended temperature range of 50 to 90°F.
- Proper surface preparation involves confirming full cure, degreasing with isopropyl alcohol, and conducting a small adhesion test before full application.
- Use hard antifouling paints for better decal adhesion, and avoid applying decals on soft or ablative coatings that shed or degrade quickly.
- Remove decals carefully with heat and low-angle peeling to prevent damaging the paint, and address any bubbling or lifting issues promptly to maintain the hull’s integrity.
- For long-lasting results, choose marine-grade vinyl with a protective overlaminate, seal edges, and wait at least 24 to 48 hours before exposing decals to water or pressure washing.
Table of Contents
- Which antifouling paints and hull conditions accept decals
- Getting the surface ready before you apply anything
- How to apply decals correctly on antifouling paint
- Keeping decals intact once they're on the boat
- How to remove decals from antifouling paint without damage
- Diagnosing common decal problems on antifouling paint
- What years of decal work on boats have taught us
- Order marine-grade decals built for the job
- Sources
- FAQ
Which antifouling paints and hull conditions accept decals
Antifouling paints fall into two broad camps, and each behaves differently under a decal. Hard antifouling paints form a dense, relatively smooth film that resists solvents and holds adhesive reasonably well once cured. Soft or ablative antifouling paints wear away by design, which means the surface is constantly sloughing off a thin layer, taking any adhesive bond with it.
Manufacturer guidance is consistent on one point: graphics belong above the waterline. Arlon's marine marking application tips recommend dry installation of overlaminated graphics above the waterline rather than on submerged surfaces, where constant water exposure and biocide leaching undermine any bond.
Cure state matters just as much as paint type. A coat that looks dry can still be releasing solvents underneath, and that residual off-gassing prevents full adhesive bonding, according to Avery Dennison's marine paint protection bulletin.pdf).
- Hard antifouling paint offers the most stable surface for adhesive decals.
- Soft or ablative antifouling paint sheds too quickly for reliable long-term adhesion.
- A recently recoated hull needs a full cure cycle before anything goes on top.
For registration numbers specifically, federal rules require plain, vertical block characters at least three inches tall that contrast with the hull, with a backing plate allowed when hull color makes contrast impractical under 33 CFR 173.27 as summarized by LegalClarity.
Getting the surface ready before you apply anything
Skipping prep is the single most common reason decals fail on painted hulls. Follow this sequence before you unroll a single sheet of vinyl.
- Confirm the antifouling paint has cured fully to the product's own timeline. TotalBoat's Krypton technical data lists dry times to overcoat and to launch that vary with temperature, and those windows are a reasonable proxy for when a surface is stable enough for graphics.
- Apply in the right ambient range. Arlon recommends installing marine graphics between 60 and 90°F, and TotalBoat's own paint instructions cite a 50 to 90°F application window for the coating itself.
- Degrease the area with isopropyl alcohol, then dry it completely with a lint-free cloth. Skip soap-based cleaners near fresh antifouling, since residue left behind interferes with adhesion.
- Scuff lightly only if the surface is glassy smooth and the paint manufacturer allows it. Never scuff soft or ablative coatings, since you'll just create more loose material.
- Run a small adhesion test patch in an inconspicuous spot and check it after a day before committing to the full decal.
Keep a squeegee, low-tack masking tape, isopropyl alcohol, a soft scuff pad, and overlaminate film on hand before you start.
Pro Tip: Press a corner of test vinyl onto the cleaned area and try to lift it after 24 hours. If it comes up easily, the paint needs more cure time or a different approach entirely.

How to apply decals correctly on antifouling paint
Dry application is the standard method for marine marking, and it gives you more control than wet techniques when you're working on a curved or uneven hull section. Position the decal first, then tack it in place with strips of masking tape along one edge so it can swing open like a hinge.
- Peel back the backing paper in sections rather than all at once, laying the vinyl down as you go.
- Squeegee from the center outward in overlapping strokes to push out air and avoid trapping bubbles.
- Remove the transfer tape at a low angle, close to parallel with the surface, rather than pulling straight up.
Stick to the 60 to 90°F range Arlon recommends for marine graphics, and avoid installing in direct sun or high humidity, which can cause the adhesive to grab unevenly.
Overlaminate and edge sealer aren't optional extras on a boat. Avery Dennison's technical bulletin calls for edge sealer on every cut edge in marine use, since an unsealed edge lets water wick under the vinyl and lift it from the inside out. For a deeper look at which films hold up best, see this rundown of durable, state-compliant vinyl options.
Give the installation time before it faces real conditions. Avery Dennison recommends waiting 24 to 48 hours before water exposure, and that same window applies before your first pressure wash.
Pro Tip: Write the install date on a piece of tape inside a locker. It's the easiest way to know when your cure window closes and your maintenance window opens.
Keeping decals intact once they're on the boat
Cleaning habits determine how long a decal survives near antifouling paint far more than the decal itself does. When pressure washing, Arlon advises staying under 1300 PSI and keeping the nozzle angle no shallower than 60 degrees, rinsing from the center of the graphic outward rather than blasting an edge head-on.
- Rinse hulls with fresh water regularly to cut down on salt buildup and UV-driven fading.
- Check edges every few weeks for lifting, and reseal a loose corner with edge sealer before it spreads.
- Treat overlaminate as cheap insurance. It blocks most of the UV and abrasion that shortens decal life.
Plan ahead for repaint cycles, too. Pull decals before a fresh coat of antifouling goes on, since painting over or around them traps solvents and guarantees a harder removal job later. For a sense of how long a well-maintained decal should hold up, this page on marine vinyl decal lifespan is worth a look. Boat owners handling their own bottom maintenance may also find UK hull cleaning steps and timing useful for building a realistic cleaning schedule around haul-out dates.
How to remove decals from antifouling paint without damage
Removal near antifouling paint calls for patience, since aggressive scraping can pull paint off along with the vinyl.
- Warm the decal with a heat gun on low or a fabric steamer, keeping the tool moving so you never overheat one spot.
- Peel at a low angle, under 30 degrees from the surface, following Avery Dennison's removal guidance for adhesive films, rather than yanking straight up.
- Clean any adhesive residue with a manufacturer-approved remover, testing it on a hidden spot first since some solvents soften antifouling paint.
- Stop immediately if the paint starts flaking, bubbling, or coming up in sheets. That's a sign the bond between paint and hull is compromised, not just the decal's adhesive.
- Once the residue is gone, rinse the area, let it dry fully, and inspect before deciding whether a touch-up coat of antifouling is needed.
For a more detailed walkthrough, see this guide on removing boat decals without wrecking the finish.
Diagnosing common decal problems on antifouling paint
Most decal failures on painted hulls follow a handful of recognizable patterns.
- Bubbling usually points to trapped air during application or paint that wasn't fully cured before the decal went on.
- Edge lift is almost always an unsealed edge letting water creep underneath, fixable with edge sealer if caught early.
- Lifting corners often mean the surface wasn't degreased thoroughly enough before application.
- Fading signals UV breakdown, which an overlaminate would have slowed considerably.
If more than a small section has lifted or the paint underneath looks disturbed, remove the decal fully and consider a repaint of that area before trying again.
What years of decal work on boats have taught us
Boat owners often assume any vinyl will stick to any painted surface, but antifouling paint is one of the least forgiving substrates out there. The gap between a decal that looks fine at installation and one that survives a full season usually comes down to cure time and edge sealing, two steps that take an extra day but prevent most of the failures we see reported. Guides on decal longevity and surface prep exist because the mistakes are so consistent and so avoidable.
— Taylor
Order marine-grade decals built for the job
Getting registration numbers right the first time saves you the hassle of a second removal and reapplication cycle on a surface that doesn't forgive mistakes. Decals produced from marine-grade vinyl selected for UV and saltwater resistance are available, with a design tool that lets you set your numbers, colors, and fonts in minutes.
| Step | What to do |
|---|---|
| Measure | Confirm hull space above the waterline for correct sizing |
| Choose material | Select marine-grade vinyl with overlaminate for edge protection |
| Order | Place your set through the online design tool |
A set of custom registration numbers starts production within 3 to 5 business days and ships free across the contiguous states, whether you're outfitting a bass boat, pontoon, or jet ski.
Pro Tip: Order your decal set as soon as your antifouling paint finishes curing so you're not waiting twice.
Start with custom boat registration numbers and decals if you're ready to move, or check the jet ski numbers page if a PWC is what needs new numbers.
Sources
- Application Tips for Marine Marking
- TotalBoat Krypton Copper-Free Antifouling Bottom Paint Instructions and Technical Details – TotalBoat
FAQ
How do you remove a decal from a boat hull?
Warm the decal with low heat, then peel it at a low angle rather than pulling straight up, following the technique described in Avery Dennison's marine film bulletin. Clean any leftover adhesive with a manufacturer-approved remover tested on a hidden spot first, and stop if the paint underneath starts lifting.
How long does antifouling paint last?
Antifouling paint's dry time to overcoat and to launch varies with temperature, according to TotalBoat's Krypton technical data, and overall lifespan depends on the specific product, hull use, and water conditions. Check the paint's own technical sheet rather than relying on a general rule of thumb.
What is the rule for boat registration number placement?
Federal guidance requires registration characters to be plain, vertical block style, at least three inches tall, and to contrast with the hull color, as summarized by LegalClarity's review of 33 CFR 173.27. A contrasting backing plate is allowed when the hull color makes direct contrast impractical.
What vinyl works best for boat decals?
Marine-grade cast vinyl with an overlaminate and sealed edges holds up best against saltwater, UV exposure, and antifouling paint's rougher surface. RegistrationDecals.com builds its registration decals from vinyl selected specifically for UV and saltwater resistance, and more detail on material choice is available in this breakdown of durable boat vinyl.