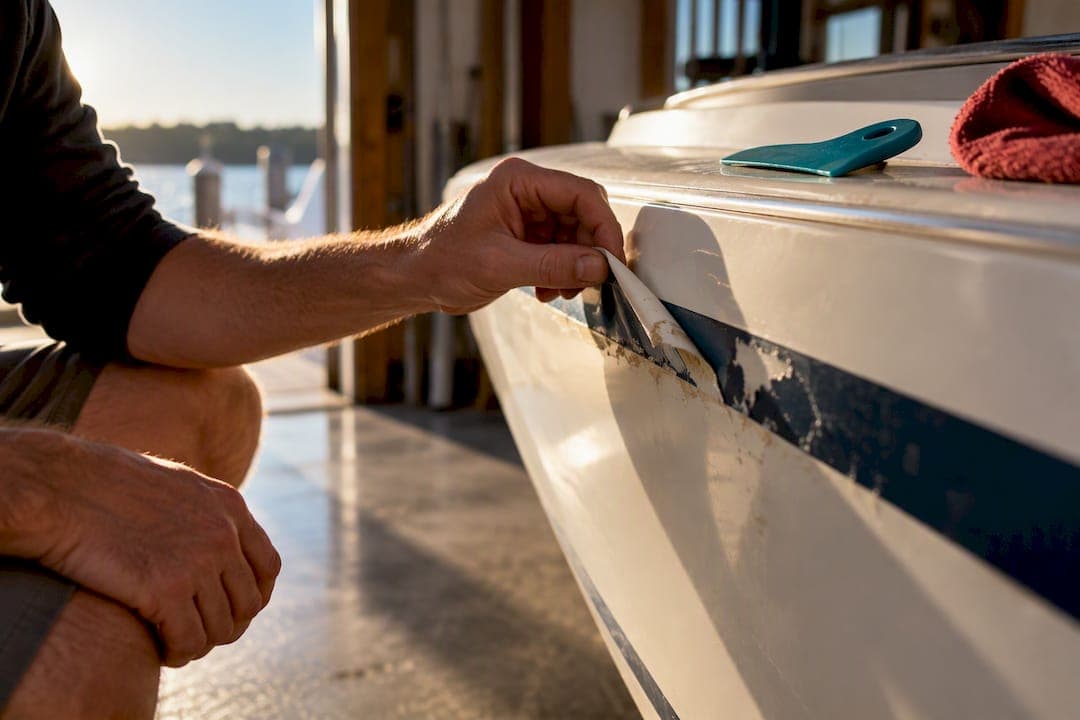
Warm the vinyl with a heat gun or hair dryer until it softens, then peel it back with a plastic scraper, using a razor only at stubborn edges and staying clear of the hull identification number. If you want ready-to-apply, state-compliant numbers once the surface is prepped, marine-grade options are available through online design and order flows.
TL;DR:
- Using marine-grade, UV-stable vinyl ensures registration numbers last longer and resist fading in harsh marine conditions.
- Proper surface preparation with dewaxing and alcohol wipes significantly improves decal adhesion and durability.
- Heat, gentle scraping, and spot-tested solvents are effective for removing old vinyl without damaging the hull, especially around the hull identification number.
- Accurate measurement and layout are critical for installation, with the option of wet or dry application based on personal preference.
- Checking your state's specific decal placement rules helps avoid compliance issues and ensures legal display of registration numbers.
Table of Contents
- Comparing safe methods to remove old boat numbers
- Removing old numbers step by step
- Cleaning adhesive residue and prepping the surface
- Choosing replacement decals that meet the rules and last
- Installing new decals so they sit straight and stick
- Fixing common problems during removal and installation
- Why marine-grade decals from RegistrationDecals.com hold up after proper prep
- Is this a DIY job or one for a professional
- Order your replacement decals from RegistrationDecals.com
- Where to check the rules and guidance behind this process
- Sources
- FAQ
Comparing safe methods to remove old boat numbers
Picking the right removal method depends on your hull material, how brittle the old vinyl has gotten, and how much adhesive residue is left behind. Most boat owners get through a full set of numbers using a mix of heat, gentle scraping, and a solvent for the last stubborn spots.
Heat is the starting point for nearly every removal job. A heat gun or hair dryer on a low-to-medium setting softens the vinyl and the adhesive underneath without scorching gelcoat or paint, as long as you keep the nozzle moving in slow, steady passes rather than holding it in one spot.
Mechanical removal comes next. A plastic scraper is the safer first tool because it lifts softened vinyl without biting into the surface below it. A razor blade held at a shallow, near-flat angle can clear stubborn corners, but it should stay off thin gelcoat or painted hulls where a slip leaves a scratch that outlasts the old numbers by years.
Solvents handle what heat and scraping leave behind. Adhesive that refuses to lift responds to acetone, isopropyl alcohol, or a citrus-based degreaser like Goo Gone, applied sparingly and tested on a hidden patch first.
- Heat: softens vinyl and adhesive; keep the tool moving to avoid scorch marks.
- Mechanical: plastic scrapers for the bulk of the job, razors only at shallow angles on solid gelcoat.
- Solvent: acetone or isopropyl alcohol for leftover adhesive, always spot-tested and used in a ventilated area.
Removing old numbers step by step
A methodical approach saves you from gouging the hull or leaving half a letter of dried adhesive behind. Gather your tools before you start so you are not hunting for a scraper with a hot heat gun in your hand.
What you need: a heat gun or hair dryer, plastic scrapers, a razor blade for edges only, lint-free towels, masking tape, work gloves, and eye protection.
- Wash the hull section around the old numbers and let it dry completely; dirt trapped under the vinyl can scratch the surface as you scrape.
- Mask off any adjacent graphics or paint lines with tape so heat and scraping stay contained to the numbers themselves.
- Test a small hidden section of vinyl with the heat gun to confirm how the gelcoat or paint responds before working on the visible panel.
- Warm one end of a number in short passes until the vinyl softens, then lift an edge with the scraper.
- Reheat as needed and pull the vinyl back at a low angle, scraping in a smooth, continuous motion rather than short jabs.
- Switch to a razor blade, held nearly flat, only for corners or edges the scraper cannot reach.
- If a patch of adhesive will not soften with more heat, move to a solvent rather than forcing it with the scraper.
- Stop and consult a marine repair shop if you see the paint or gelcoat lifting with the vinyl, since further heat or scraping will only widen the damage.
Keep the hull identification number in mind throughout this process. Federal rules require the HIN to stay visible and prohibit covering or obscuring it with decals or other material, so route your removal work around it rather than through it.
Pro Tip: Work in short heat bursts and re-test the scraper angle often. Rushing the heat step is what tears vinyl and leaves adhesive fragments stuck to the gelcoat.
Cleaning adhesive residue and prepping the surface
The prep work after removal matters more than most boat owners expect. Practical Sailor's DIY testing found that heating and scraping, followed by acetone for leftover adhesive, clears the surface reliably before new vinyl goes on. Skipping this stage is the most common reason a fresh set of numbers peels again within a season.
Dewaxing comes first. Even a hull that looks clean can carry a thin wax film that stops adhesive from bonding, so a marine prep solvent or careful acetone application removes it before anything else touches the surface.
- Wipe the area with a marine dewaxing solvent or acetone, working in small sections and checking for residue as you go.
- Use a citrus-based remover like Goo Gone for lighter adhesive, saving stronger solvents for spots that resist the first pass.
- Finish with a 70% isopropyl alcohol wipe as the last step before applying any new decal.
- Let the surface dry fully and confirm it sits within a moderate temperature range before proceeding, since very cold or very hot surfaces affect adhesive bonding.
Pre-installation cleaning and a final alcohol wipe are professional standards for marine graphic bonding, according to 3M's watercraft application guidance, which also notes that surfaces which look clean can still carry contaminants that block proper adhesion. That two-step habit, dewax then alcohol, is the difference between decals that hold for years and ones that lift within months.
Choosing replacement decals that meet the rules and last

The material you choose next determines whether you do this job again in two years or in ten. Marine-grade vinyl built for UV exposure and saltwater contact resists the fading and edge lift that ordinary sign vinyl suffers on a hull, which is the main reason marine-grade decals are worth the extra cost over generic craft-store letters.
Compliance comes before color choice. Federal guidance requires registration numbers on both sides of the forward half of the hull, in plain vertical block characters at least three inches tall, in a color that contrasts with the hull, with the validation decal placed within six inches of the registration number. Check your state's specific placement page, since some states add their own spacing or format rules on top of the federal baseline.
- Choose a marine-grade, UV-stable, saltwater-resistant vinyl over general-purpose sign vinyl for anything mounted below the rail.
- Confirm three-inch minimum character height and forward-half placement before finalizing your layout.
- Keep the validation decal within six inches of the numbers and clear of the hull identification number entirely.
- Order a spare character or two at purchase so a future ding or scratch does not force a full reorder.
Application style is worth deciding before the decals arrive. Wet application gives you more time to adjust the letters into place, while dry application sets faster but leaves less room for error. An edge sealer adds a layer of protection against water working under the vinyl's border over time.
Installing new decals so they sit straight and stick
A crooked or bubbled set of numbers undercuts even the best vinyl, so layout comes before adhesive touches the hull. Measure the forward-half placement zone and mark reference points with a pencil or grease pencil rather than guessing by eye.
- Measure and mark the character height and spacing, checking that the layout lines up with the contrast and size rules from the previous section.
- Use the hinge method: tape the decal in position, fold it back on a center hinge of tape, and peel the backing away from one half at a time.
- For wet application, mist the surface lightly with a soap-and-water solution, then squeegee from the center outward to push out air and excess liquid.
- For dry application, press from the center out immediately, working in overlapping strokes with a felt-edged squeegee to avoid scratching the vinyl.
- Peel the transfer tape back slowly at a low angle, checking that each letter stays put as the tape lifts away.
- Smooth any remaining air bubbles toward the nearest edge with the squeegee, working outward rather than trapping air in the center.
Let the adhesive cure before it faces real stress. Practical Sailor recommends waiting 48 to 72 hours before waxing over newly applied vinyl, and it is worth checking adhesion again after the boat's first outing on the water.
Pro Tip: Apply new decals on a mild, dry day out of direct sun. Vinyl adhesive bonds best in moderate temperatures, and working in the shade keeps the material from stretching as you position it.
Fixing common problems during removal and installation
Most removal jobs go smoothly, but a few situations call for stopping and reassessing rather than pushing through with more heat or a sharper blade.
- Paint or gelcoat lifting with the vinyl: stop immediately, photograph the area, and consult a marine repair shop before continuing, since more heat or scraping will only spread the damage.
- Small islands of stubborn adhesive: try another round of gentle heat, a solvent wipe, or slow, patient scraping rather than reaching for sandpaper, which can dull or scratch gelcoat.
- Cold weather brittleness: vinyl that has sat in a cold boat or garage turns stiff and tends to crack or fracture instead of peeling cleanly, so warm the hull and store new decals flat in a warm space before handling them.
- Uneven adhesive residue after cleaning: a second alcohol wipe usually clears light haze that acetone or dewaxer missed on the first pass.
A pre-installation inspection, the kind 3M documents for professional installers, is worth borrowing even for a DIY job: photograph any questionable paint or gelcoat before you start removal, so you have a record if something separates that was already compromised.
Why marine-grade decals from RegistrationDecals.com hold up after proper prep
Once the hull is clean and dewaxed, the decal material itself decides how long the job lasts. Customizable, marine-grade vinyl boat decals that are UV-safe and saltwater-proof, built specifically to resist degradation under harsh marine conditions, can provide longer durability than ordinary vinyl.
The online design tool lets you enter your registration numbers and pick colors and fonts, so the layout matches your hull before anything ships. Orders move through production in 3 to 5 business days with free shipping across the contiguous United States, which keeps a replacement job from stretching into a multi-week wait.
- Marine-grade vinyl resists UV fading and saltwater exposure better than general-purpose sign vinyl.
- The design tool applies your exact numbers, color, and font choices before production starts.
- Production and shipping timelines are built for boat owners who need a fix soon, not weeks from now.
Ordering custom decals also beats a local quick-fix kit when you want consistent sizing across both sides of the hull, guidance on compliant placement, and spare characters on hand for the inevitable scratch or ding down the road.
Is this a DIY job or one for a professional
A confident DIY boat owner can usually clear old numbers and install new ones in an afternoon, spread across removal, prep, and installation with drying time built in. The tools are inexpensive and the skills involved, careful heat control and a steady hand with a squeegee, are learnable on a first attempt if you go slowly and test before committing to the visible panel.
A professional installer earns their fee when the hull shows soft spots, when gelcoat has already started lifting at the old decal edges, or when a hull identification number sits close enough to the numbers that a mistake carries real consequences. In those cases, a pre-install inspection that documents the trouble spots before anyone touches a scraper is worth the extra step, whether you do it yourself with a phone camera or a shop does it as standard practice.
— Taylor
Order your replacement decals from RegistrationDecals.com
- Design your set online, then choose wet or dry application to match your installation preference.
- Confirm size and placement against your state's regulations before finalizing the order.
- Check the installation guide for layout tips specific to your hull shape.
Orders often ship in a few business days with free shipping available within the contiguous United States, so a fresh, compliant set of numbers can arrive promptly after ordering.
Where to check the rules and guidance behind this process
Before you replace a single number, confirm the placement and renewal rules for your own state, since requirements vary beyond the federal baseline.
- USCG Boater's Guide to Federal Requirements covers display, sizing, and validation decal placement.
- 3M's watercraft application bulletin details professional surface prep and post-heat steps.
- Check your state's boat registration decal rules for renewal timing and expiration dates before you order.
Sources
- 3M instruction bulletin: application — watercraft
- A Boater's Guide to the Federal Requirements for Recreational Boats (USCG)
- Vinyl boat lettering DIY application and repair — Practical Sailor
FAQ
How do you remove old numbers from a boat?
Warm the vinyl with a heat gun or hair dryer, then lift it with a plastic scraper, switching to a razor blade at a shallow angle only for stubborn edges. Clean any leftover adhesive with acetone or isopropyl alcohol, always testing on a hidden spot first, and keep heat and blades away from the hull identification number.
How can you restore faded boat decals?
Faded vinyl generally cannot be restored to its original color and is best replaced rather than repaired, since UV damage breaks down the vinyl's pigment permanently. A full replacement with marine-grade vinyl built for UV resistance prevents the same fading from happening again as quickly.
Where can you buy boat registration numbers?
Marine-grade replacement numbers are available through specialty decal sellers such as Registrationdecals, which offers an online design tool for custom sizing, color, and font before production. Custom orders typically ship faster and match both sides of the hull more consistently than letters sourced piecemeal from a local supplier.
What kind of vinyl is used for boat decals?
Marine-grade vinyl designed for UV stability and saltwater resistance is standard for boat registration numbers, since ordinary sign vinyl degrades faster in constant sun and water exposure. This type of vinyl also holds its adhesive bond better through temperature swings than general-purpose vinyl.
Do boat registration numbers need to stay a certain size?
Yes, federal guidance requires registration numbers to be at least three inches tall, in plain vertical block characters, placed on the forward half of the hull in a color that contrasts with the boat. Some states add further placement or spacing requirements, so check your state's specific page before ordering.