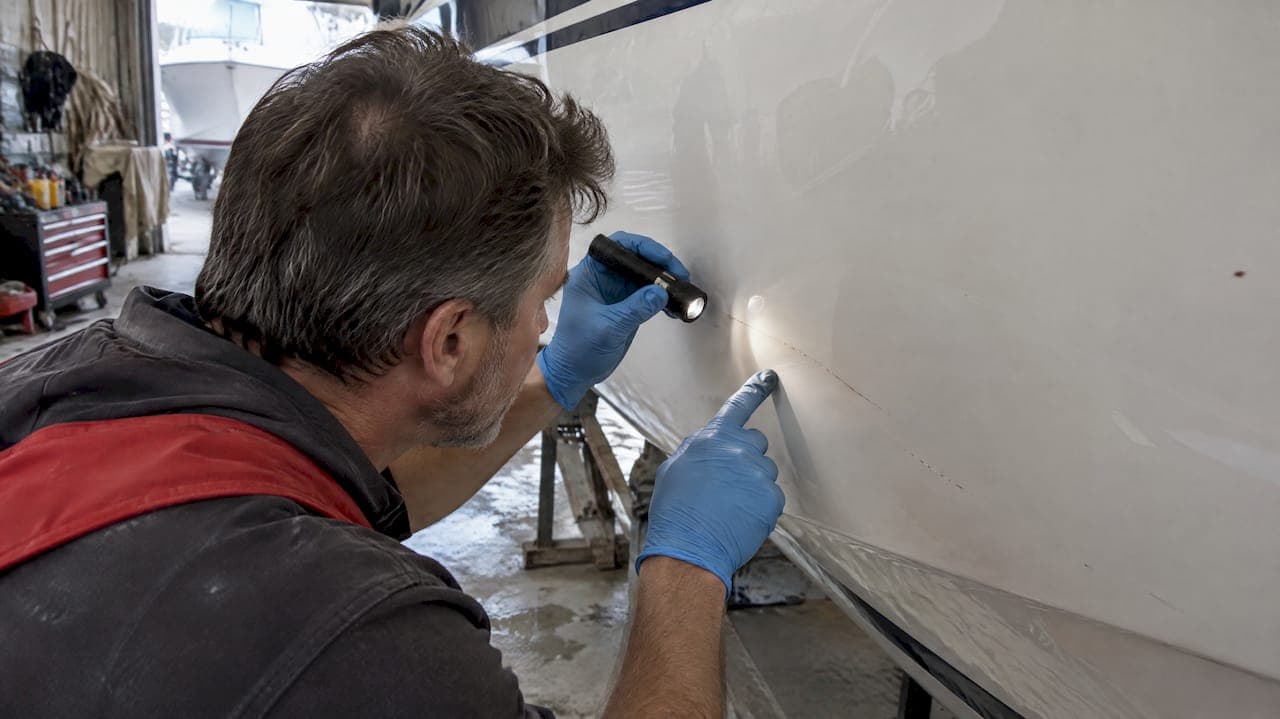
A decal placed directly over a cracked gelcoat surface is a cosmetic mask, not a structural repair, and it holds up only on small, stable hairline cracks that are not actively moving. If the crack flexes, runs deep, or sits near a stress point like the transom, you need to repair the gelcoat first. Inspect and test the surface before you order any decal.
TL;DR:
- Applying a decal over cracked gelcoat works only on small, stable, and non-flexing cracks to prevent failure or peeling.
- Surface inspection including flex tests, sound checks, and moisture tests is essential before decal application, especially near stress points like the transom.
- Repair depth dictates prep: shallow cracks need just touch-up, while deeper damage requires gelcoat and fiberglass repairs before decals go on.
- Proper surface cleaning, sanding, and temperature control (around 60-90°F) are critical for decal adhesion and long-term durability.
- Overlaminate films outperform clear coats for UV and saltwater protection, and decal maintenance includes regular inspection and gentle cleaning.
Table of Contents
- How to inspect and classify gelcoat cracks
- What happens if you apply vinyl over cracked gelcoat
- Repair and surface-prep options before applying decals
- Exactly how to apply a decal over repaired or stable gelcoat
- Protecting decals and monitoring repaired gelcoat
- Safe decal removal from gelcoat and post-removal cleanup
- Practical tips and proven methods from RegistrationDecals.com
- Practical verdict: when to accept a decal patch and when to invest in repair
- RegistrationDecals.com for durable, marine-grade decal replacements
- FAQ
- Sources
How to inspect and classify gelcoat cracks
Not every crack behaves the same way, so the first job is sorting out what you are actually looking at. Hairline cracks are thin surface lines, usually from age or UV exposure, that sit still when you press on them. Spider cracks radiate outward from a single point, often from an impact, and can signal flex underneath. A through-crack goes past the gelcoat into the laminate and almost always needs structural attention.
A few simple checks tell you which category you are dealing with:
- Press firmly near the crack and watch for flex or movement, which suggests the substrate underneath is unstable.
- Tap around the area and listen for a dull or hollow sound, a common sign of delamination.
- Check for soft spots or dampness, which can point to moisture intrusion in the laminate.
- Look for separation at the crack's edges or large chips, both signs the damage goes deeper than the surface.
Cracks near the transom or stringers deserve extra scrutiny, since these areas carry structural load. The transom inspection guide walks through what to check first in these high-stress zones. If you see any of the red flags above, stop and move to repair before thinking about decals at all.
What happens if you apply vinyl over cracked gelcoat
Vinyl film follows the surface underneath it, which is both the appeal and the problem. If the gelcoat continues to move or flex along a crack line, that motion telegraphs straight through the film and the decal eventually splits in the same spot. Industry application guidance confirms this directly: gelcoat that cracks will also crack the applied film, since adhesives and films cannot stop the substrate from moving underneath them.
Chalked or outgassing surfaces create a second failure path. Older gelcoat often releases trapped air or fine powder over time, and a decal applied on top can lift, tent, or stain within weeks if that layer was not addressed first.
A decal applied directly over a crack without repair typically fails where the substrate keeps moving, according to 3M's watercraft application bulletin, which recommends substrate inspection and outgassing tests before any graphic goes on.
That said, a decal can be a reasonable cosmetic choice on a crack that has been confirmed static, shallow, and isolated from flex. The line between masking a problem and making an acceptable cosmetic call comes down to whether you tested the surface first.

Repair and surface-prep options before applying decals
The right repair depends on how deep the damage goes. A single stable hairline often only needs a crack-penetrating touch-up product. A wider or slightly deeper crack usually calls for widening the groove, filling it, and sanding flush. A crack that reaches the laminate needs a full gelcoat and fiberglass repair, not a surface patch.
Once you know which category applies, the prep sequence stays consistent:
- Wash the area thoroughly to remove salt, grime, and loose debris.
- De-chalk with mild abrasive polishing if the gelcoat has a powdery surface, a step 3M's substrate selection guidance calls out directly.
- Run a tape-snap and outgassing test to confirm the surface will hold an adhesive.
- Wipe with solvent to strip residues the wash did not remove.
- Sand and taper the crack's edges so repair material bonds smoothly into the surrounding gelcoat.
For hairline work, a gelcoat paste matched to the hull color closes the gap with minimal fuss. For wider cracks, a catalyzed laminating gel coat applied to a properly beveled edge gives a repair with real thickness and durability, the method Evercoat's Premium Gel-Kote technical data sheet describes for permanent fixes. When the laminate itself is compromised, soft spots or delamination mean a cosmetic filler will not hold, and the correct fix is a resin and mat rebuild before any new gelcoat goes on.
Polyester filler works for small cosmetic gaps but can discolor under UV over time, while epoxy suits structural laminate work better than cosmetic finishing. Widening small cracks and solvent wiping before bonding, as outlined in Tap Plastics' gelcoat repair guide, makes the difference between a repair that holds and one that lifts within a season.
Pro Tip: Match gelcoat paste to your hull color in direct sunlight, not under shop lighting, since gelcoat often shifts shade as it cures.
Exactly how to apply a decal over repaired or stable gelcoat
Once the surface is repaired and clean, application technique determines whether the decal lasts years or months. Surface temperature matters more than most owners expect: 3M recommends an application window of roughly 60°F to 90°F to get proper initial adhesion. Outside that range, the adhesive either sets too fast to position correctly or too slow to grab at all.
The application itself follows a short, repeatable sequence:
- Wash the surface with soap and water, then de-chalk if needed before moving to solvent.
- Wipe down with a solvent cleaner to remove any remaining residue or wax.
- Squeegee from the center outward in overlapping strokes, working out bubbles as you go.
- Avoid stretching the vinyl during application, since stretched film tends to pull back from edges later.
- Post-heat the decal with a heat gun to relieve film memory and reduce tenting around contour changes, a step 3M's application bulletin specifically recommends.
After installation, check the edges for full adhesion and watch for tenting, where the film lifts slightly over a seam or crack line. A short inspection a few days later, then again at the one-month mark, catches most early failures before they spread.
Pro Tip: If you see a small bubble form in the first 24 hours, a fine needle and gentle heat can release trapped air without damaging the film, following the same method covered in our guide to fixing decal bubbles.

Protecting decals and monitoring repaired gelcoat
A protective layer extends decal life, but the two common options come with different trade-offs. Overlaminate film adds a dedicated UV and abrasion barrier over the vinyl, and our guide to making decals last 7 to 10 years covers the maintenance that keeps it effective. Clear coating over a decal can work too, but it raises adhesion and warranty risks the clear coat guide explains in more detail.
Ongoing care matters as much as the initial choice:
- Rinse with fresh water after saltwater exposure and avoid abrasive cleaners near decal edges.
- Inspect every few weeks for small splits or edge lifts and address them before they spread.
- Treat any new lifting at a crack line as a sign the underlying repair may need another look.
If you are only patching cosmetically, accept that it is a short-term fix. If resale value or structural integrity are in play, plan for a proper gelcoat restoration instead.
Safe decal removal from gelcoat and post-removal cleanup
Removing an old decal without damaging the gelcoat underneath takes patience more than force. Warm the film gently with a heat gun and peel slowly at a low angle, then follow with an adhesive solvent to lift any remaining residue. Use plastic scrapers only, since metal tools scuff gelcoat permanently.
- Heat and peel the decal slowly, keeping the angle low to avoid tearing.
- Apply adhesive solvent to dissolve leftover residue, then wipe clean.
- Polish stubborn spots if residue remains, and confirm the surface is smooth before repair or reapplication.
Our guide to removing adhesive from gelcoat walks through the full process step by step.
Practical tips and proven methods from RegistrationDecals.com
From years of producing marine decals, we have found overlaminate consistently outperforms clear coat for saltwater exposure, and that a heat-and-needle fix resolves most bubbles within a day. For material comparisons, see our guide to the best vinyl for boats, and for bubble repairs, our fix-it guide covers the details.
Practical verdict: when to accept a decal patch and when to invest in repair
A decal over a stable hairline crack is a fair trade for a quick, low-cost cosmetic fix, especially on an older boat you are not planning to sell soon. But when structural integrity, resale value, or warranty terms are on the line, repair-first is the only approach that holds up. Skipping that step just delays the real cost.
— Taylor
RegistrationDecals.com for durable, marine-grade decal replacements
Once your gelcoat is repaired and properly prepped, marine-grade vinyl decals built to handle UV and saltwater exposure are available from providers using an online design tool to enter registration numbers and pick colors and fonts. Such providers often offer free shipping within the contiguous United States with typical delivery times of a few business days.
| Boat type | Where to order |
|---|---|
| General registration numbers | Custom Boat Registration Numbers & Decals |
| Jet ski | Jet Ski Numbers |
| Pontoon | Pontoon Numbers |
| Bass boat | Bass Boat Numbers |
Order only after your surface passes the prep steps above. If you need guidance on sizing or placement first, our registration number answers page covers the common questions.
FAQ
How can I remove decals from gelcoat?
Warm the decal gently with a heat gun, peel it slowly at a low angle, then use an adhesive solvent to clear any remaining residue. Stick to plastic scrapers rather than metal ones to avoid scuffing the gelcoat underneath.
What paint will stick to gelcoat?
Gelcoat paste and catalyzed laminating gel coat, like the products described in Evercoat's Premium Gel-Kote technical data sheet, are formulated specifically to bond to prepared gelcoat surfaces. Proper sanding, tapering, and solvent wiping beforehand matter as much as the product choice.
Do decals go under or over clear coat?
Decals typically go on before a clear coat is applied, since clear coating over existing vinyl raises adhesion and warranty concerns. Our clear coat over decals guide explains when clear coating after the fact is and is not a reasonable option.
Can you mod podge over vinyl decals?
Mod Podge is not designed for marine exposure and is not a substitute for a proper overlaminate film on boat or RV decals. For lasting UV and saltwater protection, an overlaminate rated for marine use, as covered in our guide to making decals last, holds up far better outdoors.
Sources
- Application: Watercraft (3M instruction bulletin)
- Premium Gel-Kote technical data sheet (Evercoat)
- How to repair gelcoat (Tap Plastics)