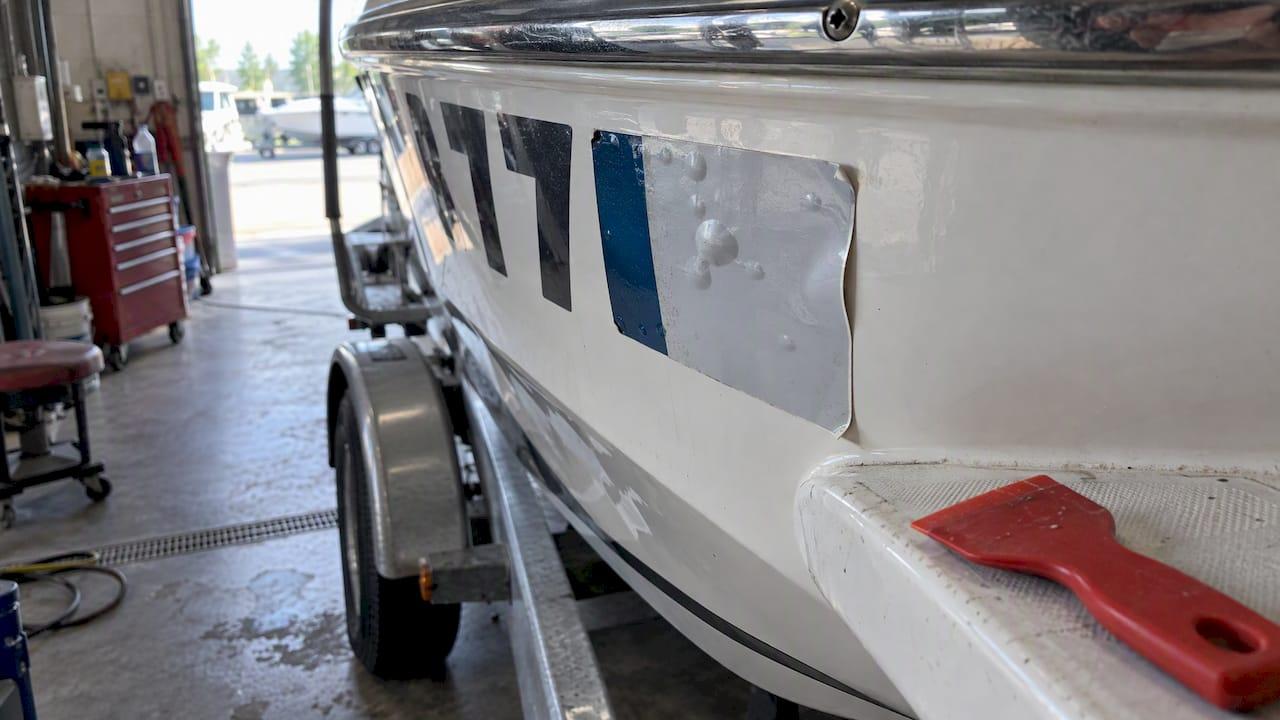
Outgassing is what happens when gases escape from the surface under a decal and the vinyl traps them. They show up as small bubbles that grow, merge and blister the film. Unlike a bubble left by a sloppy squeegee job, they keep coming back. The usual causes are paint or gelcoat that has not finished curing, a repair done too recently, or a surface that was never fully dry. The fix is to deal with the surface first and the vinyl second.
Below, we explain how to tell outgassing from ordinary trapped air, how long to wait before applying anything, how to prep a hull properly, and what to do when bubbles appear on a decal that is already on.
TL;DR
- Outgassing bubbles are gas escaping from the surface, so they come back after you pop them. Trapped-air bubbles from application usually flatten out and stay flat.
- New paint and new fiberglass need time to cure. Film makers publish simple test patches you can run in 24 hours before you commit to a full set.
- Clean with a solvent-based wax remover, then 70% isopropyl alcohol and water, and apply between 60°F and 90°F.
- Small, early bubbles can sometimes be managed with gentle heat and a fine pin. Large blisters usually mean the film has to come off.
- Remove old decals with a hair dryer and a plastic scraper, never a razor blade.
Table of Contents
- What outgassing under a decal looks like
- Why gas ends up under the vinyl
- How long to wait before applying decals
- Prep and application that lower the risk
- What to do when bubbles appear
- Removing a failed decal without damaging the gelcoat
- Our perspective
- Order numbers sized for your boat
- FAQ
- Sources
What outgassing under a decal looks like
Outgassing starts as tiny bubbles, often pinhead size, scattered across the decal. Over days or weeks they grow and join up into larger blisters. Industry sign-shop writing describes the same pattern: the bubbles do not go away on their own and may force you to remove the failing film.
Here is how to separate it from the two problems it gets confused with.
| Problem | When it shows up | What it looks like | Does it return after you pop it? |
|---|---|---|---|
| Trapped air | Within hours of application | Larger, soft, irregular pockets, often near the center | No, once pressed out |
| Outgassing | Days to weeks later, often after sun exposure | Many tiny bubbles that grow and merge | Yes |
| Adhesion failure | Weeks to months later | Lifting at edges or corners, dirt under the edge | Not a bubble problem, the film is letting go |
Heat and sunlight make outgassing worse. A white or dark hull sitting in July sun warms the surface, expands whatever gas is in there and pushes it into the film. That is why a decal can look perfect on a cool Saturday and blistered by the next weekend.
Why gas ends up under the vinyl
The gas comes from the surface, not the vinyl. Several sources are common on boats.
Fresh paint and fresh gelcoat
Paint releases solvent as it cures. A surface can feel dry to the touch while solvent is still working its way out. Avery Dennison notes in its substrate preparation bulletin that uncured or poorly prepared aftermarket paint can cause outgassing, bubbling or adhesive problems, and that it does not warrant applications over aftermarket automotive paints. If a previous owner repainted the hull or a transom, treat that area as suspect.
New or recently repaired fiberglass
New fiberglass can release volatiles as the resin finishes curing. Repairs, patches and recoated areas do the same. Applying a decal over a repair that is a few days old is one of the most common ways a clean install turns into a blistered one. If you are working near cracks, our guide to inspecting and repairing gelcoat cracks before applying decals covers what to fix first.
Moisture in the surface
Water trapped in a substrate can also push bubbles up beneath vinyl. Plaskolite says moisture in polycarbonate sheet can cause bubbles beneath vinyl, so the sheet should be dried before film goes on. The same logic applies to a hull that has been wet for weeks and was dried quickly.
Plastics and airtight films
Design News explains that plastics can trap gas during molding, that heat, sunlight and time can expand it, and that an airtight sticker can trap whatever escapes beneath it. Jet ski and some small-craft parts are plastic, so this applies to them too.
Is it outgassing or a gelcoat blister?
Don't confuse decal bubbles with true hull blisters. Blisters in the gelcoat itself are a different problem. The Gougeon Brothers attribute them to water penetrating the laminate and dissolving water-soluble material, which creates osmotic pressure against the gelcoat. If the bumps are in the hull surface with the decal peeled back, you are looking at a hull issue, not a decal one. Talk to a marine surveyor or a fiberglass repair shop before you cover it with anything.
How long to wait before applying decals
The honest answer is that it depends on the surface, and there is a quick test that tells you more than any calendar.
- New paint: Hexis says fresh paint should dry for at least 7 days at 25°C (77°F) and pass an outgassing test before film goes on.
- New fiberglass: Avery Dennison recommends testing with a sample of film. Leave it for 24 hours at room temperature, or bake it for 3 hours at 65°C where that is practical. Bubbles mean the surface is still outgassing.
- If the test fails on new fiberglass: Avery Dennison advises curing the fiberglass for 5 days at 60°C and then repeating the test. That is a shop process. On a finished boat in a driveway, the practical version is to wait longer and test again.
Running a patch test at home
- Cut a square of the same vinyl you plan to use. Hexis suggests about 15 cm by 15 cm (roughly 6 by 6 inches).
- Apply it to a hidden spot with the same prep you will use for the real decals.
- Leave it for 24 hours, ideally with some sun on it.
- Look closely in raking light. Any bubbles mean you should wait and test again.
A clean patch does not guarantee the whole hull is finished, but a bubbled patch is a clear warning. It costs you a scrap of vinyl rather than a full set.
Prep and application that lower the risk
Prep will not cure a surface that is still gassing, but it removes every other cause of bubbles and failure. 3M's watercraft instructions give a clear sequence:
- Clean the boat right before you apply.
- Remove wax with a solvent-based cleaner.
- Wipe with a mix of 70% isopropyl alcohol and 30% water.
- Dry completely.
- Apply only when both the air and the hull are between 60°F and 90°F.
A few practical notes from that list. A hull left in direct summer sun can be well above 90°F even when the air is mild, so work in shade or early morning. Wax and polish are the usual cause of edge lift, which looks like an adhesion issue but starts as a prep one. And if you plan to ceramic coat, put the decals on first, as we explain in applying decals before ceramic coating.
For the application itself, our soapy water method keeps the soap to a maximum of 2 drops per liter, which lets you slide and position the numbers without weakening the bond. After the decal is on, give it time before washing or launching. Our 24 to 48 hour rule explains why.
One caution on air-release films. FineCo Sign Supplies explains that they give trapped air a path out during installation, but cannot pull solvents from an uncured, green panel. A breathable film is not a substitute for waiting.

What to do when bubbles appear
Start by deciding which kind you have.

Bubbles in the first day or two, soft and irregular. This is most likely trapped air. Press toward the nearest edge with a soft cloth wrapped around a plastic card. If one stays, prick it at the edge with a fine pin and press the air out. We walk through this in fixing decal bubbles with safe heat and a needle.
A scatter of tiny bubbles that return. This points to outgassing. Pricking them gives only temporary relief, and heat can speed up the gas release. Note where they are and how fast they come back.
Large blisters or bubbles across most of the decal. Plan to remove the film, let the surface cure further, then run a patch test and reapply. Registration numbers are a legal requirement on most powered boats, so replace failed ones promptly. Our guide to replacing peeling boat numbers covers the three-inch federal rule.
Go easy with heat. Too much will soften the adhesive, stretch the vinyl or mark the gelcoat. A hair dryer is gentler than a heat gun, and a heat gun should stay moving and well back from the surface.
Removing a failed decal without damaging the gelcoat
Most damage on boats happens at removal, not application.
- Heat gently. A hair dryer or a heat gun on low softens the adhesive so the film lifts in one piece.
- Scrape with plastic only. Boat Trader warns that razor blades can gouge the boat.
- Use a rubber stripe-removal wheel with care. The same article describes a 3M stripe-off wheel and stresses controlling rpm and pressure. Wheels generate heat, and too much can burn the gelcoat and leave brown marks.
- Clean residue last. Boat Trader says lacquer thinner removes the adhesive. It is a strong solvent, so test a hidden spot first, keep it off anything painted, and use gloves and ventilation.
On adhesive removers such as Goo Gone, we found no manufacturer or boat-industry source confirming it as safe for gelcoat. Forum posts report mixed experiences. Treat it as untested on your hull: try a small hidden patch, use a little, wipe it off, and rinse. If you have any doubt, ask the boat's builder or a fiberglass repair shop.
Expect some ghosting where an old decal sat. The gelcoat under it was shielded from sun and oxidation while the rest of the hull aged. Compounding and waxing the whole panel evens it out in many cases. A decal that is replaced in the same place hides it anyway.
Our perspective
We produce registration decals in-house, and most of the bubble complaints we hear about are surface timing problems, not film problems. A boat that just came out of a refinish or a gelcoat repair is not ready for numbers, no matter how good the vinyl is. The part we can control is the film: we use marine-grade vinyl chosen for UV and saltwater resistance, and our guide to the best vinyl for boats explains why that matters.
Our advice is simple. Wait until the surface has truly cured. Run a patch test with a scrap. Prep the same way every time. Apply in moderate temperatures. And if you want the numbers to last, consider overlaminate for 7 to 10 years of life and read how to prevent decal fading. A decal that fails in a month nearly always has a surface story behind it.
— Taylor
Order numbers sized for your boat
When the surface is ready, you can build your set in a few minutes: enter your registration number, choose colors and fonts, and check it against your state's rules. Custom boat registration numbers and decals are $35.99 per set. Production takes 3 to 5 business days, and shipping is free across the contiguous United States.
We also have pages for specific hulls: jet ski numbers, pontoon numbers, bass boat numbers, aluminum boat numbers and center console numbers. Marinas and dealerships can order in bulk.
FAQ
Will bubbles under a boat decal go away on their own?
Trapped air sometimes settles, especially in warm sun, but outgassing bubbles do not go away and usually grow. If tiny bubbles keep appearing across the decal, expect to remove the film, let the surface cure, and reapply after a patch test.
Can I pop outgassing bubbles with a pin?
You can, but it is usually a short-term fix. The gas keeps coming from the surface, so new bubbles form. A pin works best on a few isolated trapped-air bubbles in the first days after application, with the hole made at the edge of the bubble.
How long should I wait to put decals on a new paint job?
Hexis says at least 7 days at 25°C (77°F) and a passed outgassing test. Check with the painter or the paint maker too, since cure times vary by product. A 24-hour patch test is the practical confirmation.
What temperature is best for applying boat decals?
3M specifies 60°F to 90°F for both the air and the hull. Hulls in direct sun can run hotter than the air, so apply in shade or in the morning.
Is a razor blade safe for removing old boat decals?
No. Boat Trader warns that razor blades can gouge the boat. Use heat and a plastic scraper, then deal with adhesive residue on a small test area first.
Sources
- Outgassing Paint and Vinyl Graphics, Supply55 Blog
- IB 1.01 Substrate Cleaning and Preparation, Avery Dennison
- Vinyl Application to Tuffak Polycarbonate Monolithic Sheet, Plaskolite
- Bubble, Bubble, Outgassing and Trouble, Design News
- Gelcoat Blister Diagnosis, Repair and Prevention, Gougeon Brothers
- Boat Wrapping guide, Hexis
- Application: Watercraft, 3M Instruction Bulletin
- Apply Vinyl Without Bubbles, FineCo Sign Supplies
- Removing Vinyl Boat Lettering and Decals, Boat Trader